
Your First Experience Sketch
![]()
Your Engduino may have already come with this pre-programmed. However, if it doesn't, or if you have erased the firstExperience program by mistake, just follow the steps at the bottom of this page to upload it to the Engduino.
What does it do?
The firstExperience sketch intends to explore the sensors and LED lights on the Engduino board. There are 4 different modes for this sketch. Press the button the number of time of the mode you intend to run to change the mode. The number of RED lights when you press the button indicate the mode.
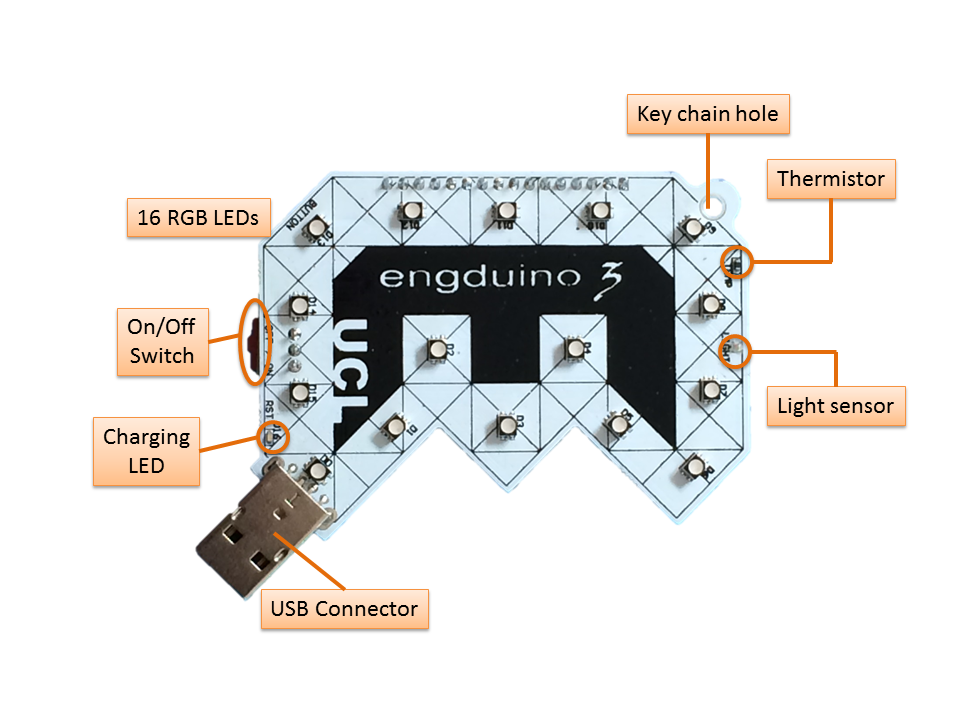
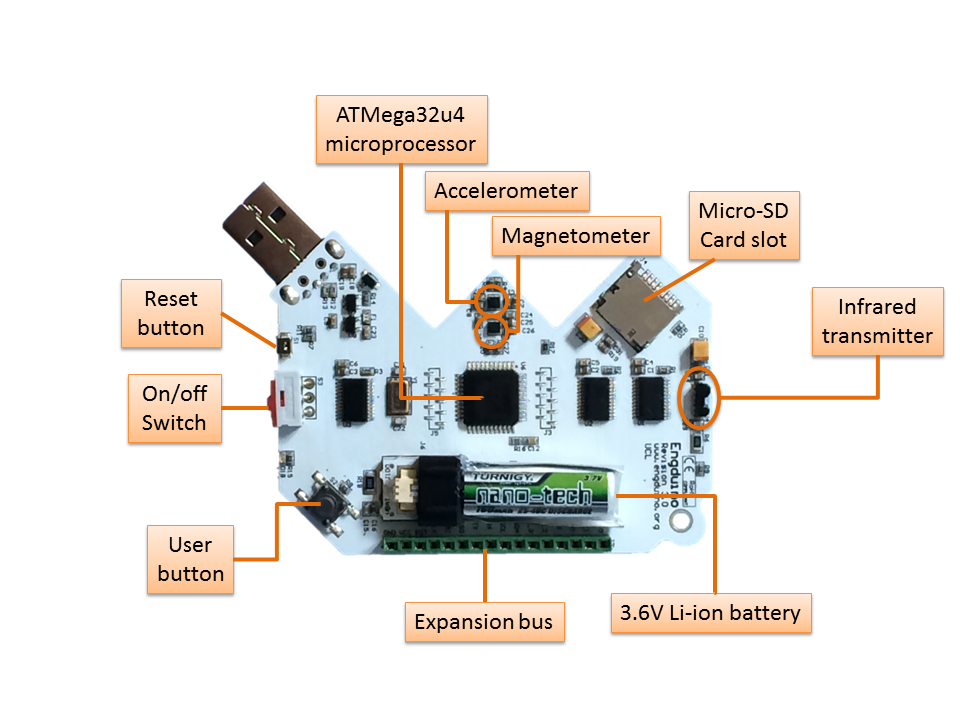
What's on the Engduino and where? Take a look at the pictures below:-
Mode 1 | Running LED A running loop of beautiful light display testing the different colours and sequence that you can do with the 17 full colour LEDs on Engduino. We believe that you can create something even better! | |
Mode 2 | Temperature LED Locate the temperature sensor on the Engduino. What would happen when you blow on the sensor? | |
Mode 3 | Level Try to make the Engduino level. If you get it level, 4 of the lights will be green. Otherwise, the tilted down sides will have a red light on. | |
| Mode 4 | Memory Game The Engduino will show you a set of light sequences at the either of the four sides with blue lights! Tilt the board to repeat the patterns shown. Starting with level 1 with one pattern, moving up one level every time you get it right. If you get the sequence wrong, all the lights will flash RED twice. The engduino will show you the last level you have achieved with number of red lights at the USB connector corner. You will continue the challenge at the same level. You have only 3 lives before you have to start all over again! There are 16 levels. You think this is easy? The light sequences get shown faster and faster in each level. And it gets very hard about level 10! | |
| Mode 5 | Reaction Game A very simple game that requires you to press the button when a blue light is shown! That is all. If you got it right, nothing will happen. If you got it wrong, all the lights will flash red twice. Beware of the off-blue colour! We are sure that with your creative mind you can make this game a lot more challenging ! |
Prepare your Arduino Environment
![]()
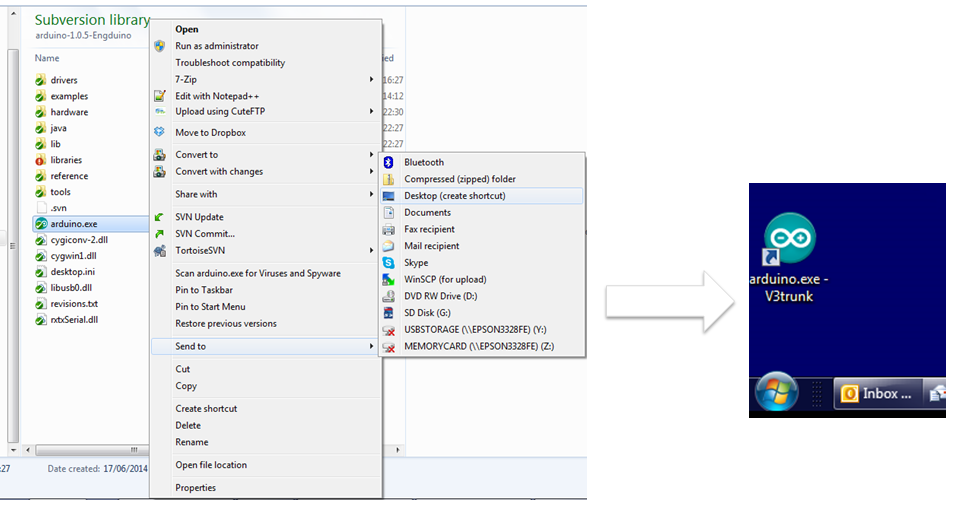
To start, open Arduino.exe in the [your Arduino dir] folder if you used our suggestion here, this will be C:\Program Files. You can create a shortcut or pin the application to your task bar for easy access in the future.
Follow these steps to prepare your Arduino Environment:-
1.1. Open Arduino
|  |
| 2. Select Engduino | 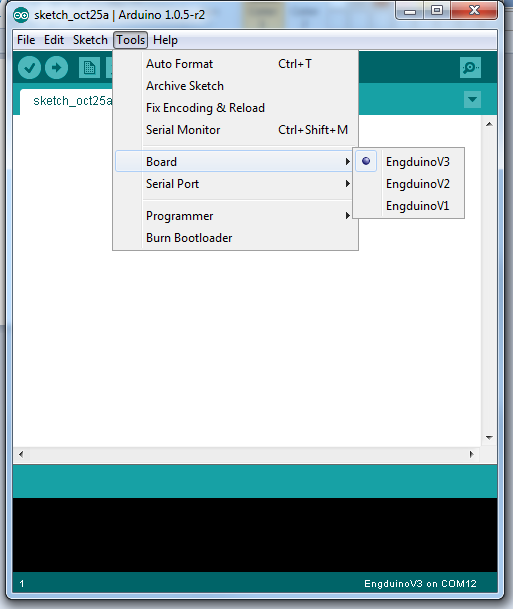 |
3. Select Serial Port | 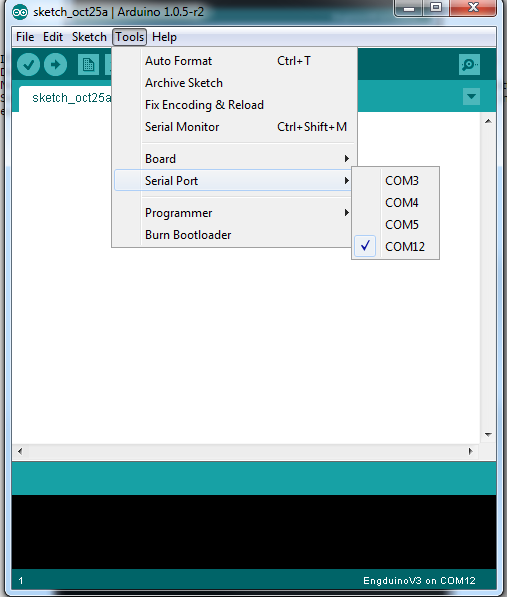 |
Upload the First Experience Examples
![]()
The Engduino software package (both complete and extension packages) comes with a set of examples for you to start your Engduino experience. They are stored in the 100.Engduino folder.
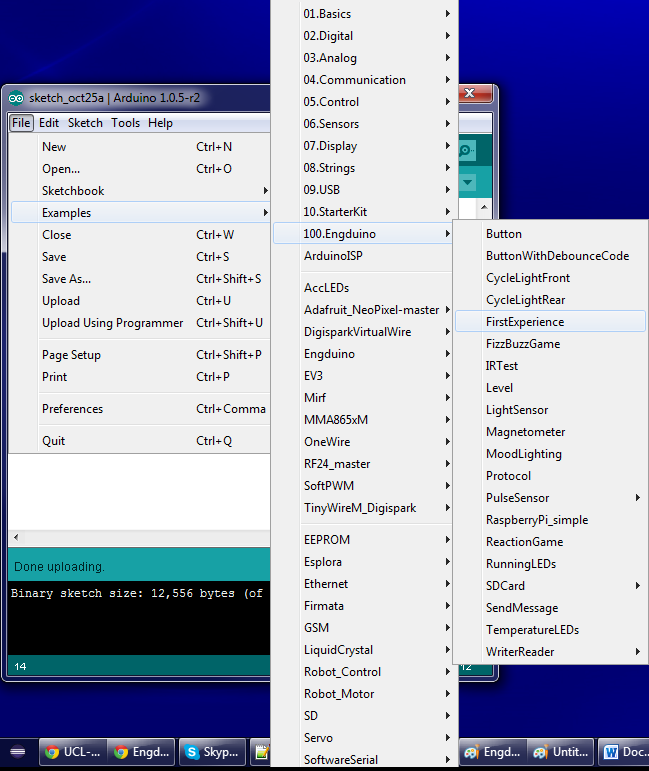
Start with the File->Examples->100.Engduino->FirstExperience sketch (program). It will open up in your Arduino windows.
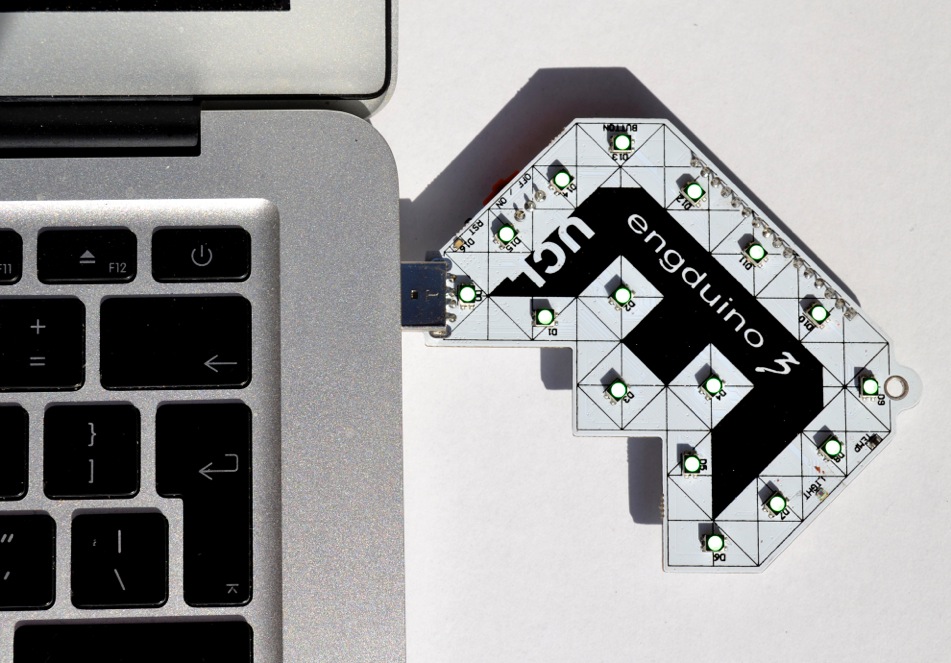
Plug in your Engduino into a USB port on the computer or laptop.
Press the Upload button on the tool bar.

!Congratulations! You have upload your first program to the Engduino! You can now experiment the 5 different modes of First Experience.
Now What?
![]()
You have just started your journey with your Engduino. Now, you can create your own Sketch with your applications, games and light show and upload them to your Engduino. Every time you upload a new sketch, you will erase your old one. But don't worry, if you save all your works, you can always upload another sketch back later!
 |  |