Uncompressed dmg package for MAC
(Engduino 3)
![]()
Windows Installer
![]()
Zip package for windows
(Engduino 1,2 and 3)
![]()
The Engduino package includes the Arduino IDE programming environment and the relevant drivers. It has everything you need to get start with programming the Engduino. You can download complete packages for both Mac and Windows operating system.
Mac OS X Users
First work out what version of the Engduino you have - it's written on the back. Then download the appropriate software for your model - the software is different in each case. This is because some changes have been made as part of the redesign and to accommodate new sensors in the version 2 hardware. You can also refer to the version guide to work out which version of Engduino you have.
If you have version 1 of the Engduino hardware, download Engduino_v1.dmg. If you have version 2 of the Engduino hardware, download Engduino_v2.dmg. Double click the downloaded dmg file. It should automatically open for you like this.

Like it says, just drag the Engduino app to your Applications folder. Once that's done, open your applications folder and double-click the Engduino App to open. All done. The drivers and libraries are installed. Take a look here to configure your Arduino environment with the correct USB settings.
Mac Installation Video
Windows Users
The latest version of Engduino (an Arduino based software) will work with all three versions of Engduino.
(This section applies only to Windows installation. For Linux see here. If you do not already have an installation of the Arduino platform code, or if you have an installation before v1.02, the easiest way of installing the necessary code is to download it all from here. We have included the Engduino header, libraries and examples.)
Download the zipped code from here and extract it into a directory of your choice. We suggest you install it in the C:\Program Files directory but if you cannot, or you wish to install it elsewhere (e.g. your home directory), just make a note of where you chose.
Installing the Engduino drivers
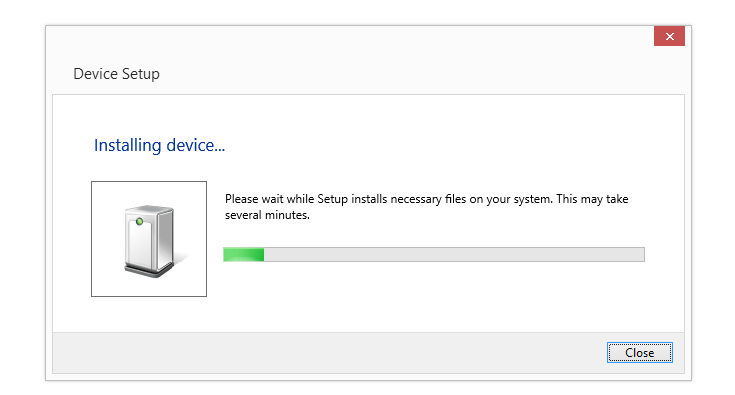
1. Go ahead and plug your Engduino into a free USB port. Windows will attempt to install drivers for your device and will fail. This is normal.
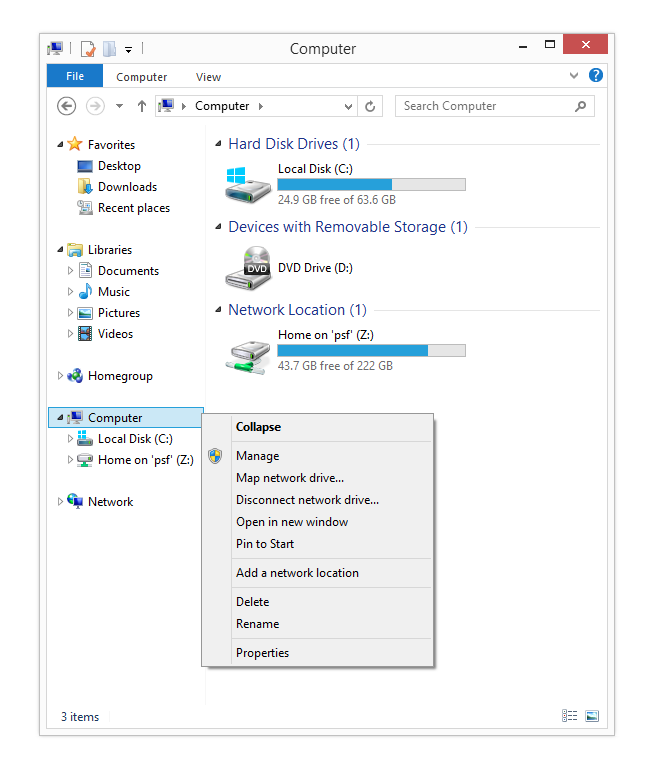
2. Once it has finished failing. Open an explorer window and in the sidebar on the right Right-Click on Computer then select Manage.
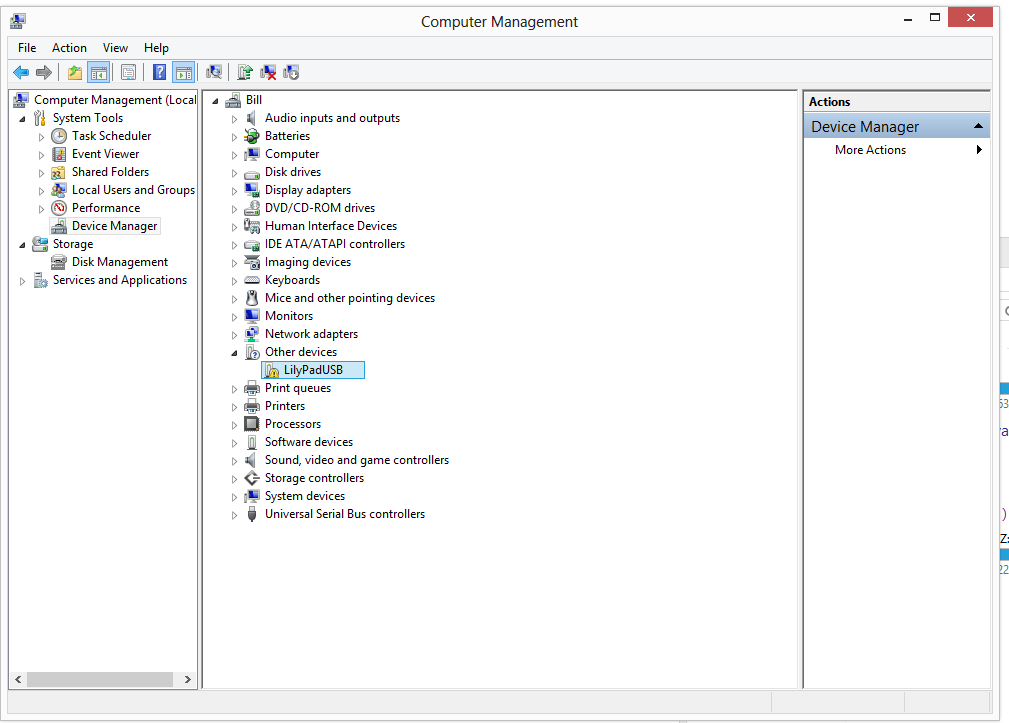
3. In the computer management window, on the sidebar on the right, select Device Manager. Then look for LilyPadUSB which will have a small yellow exclamation mark on it under Other devices.
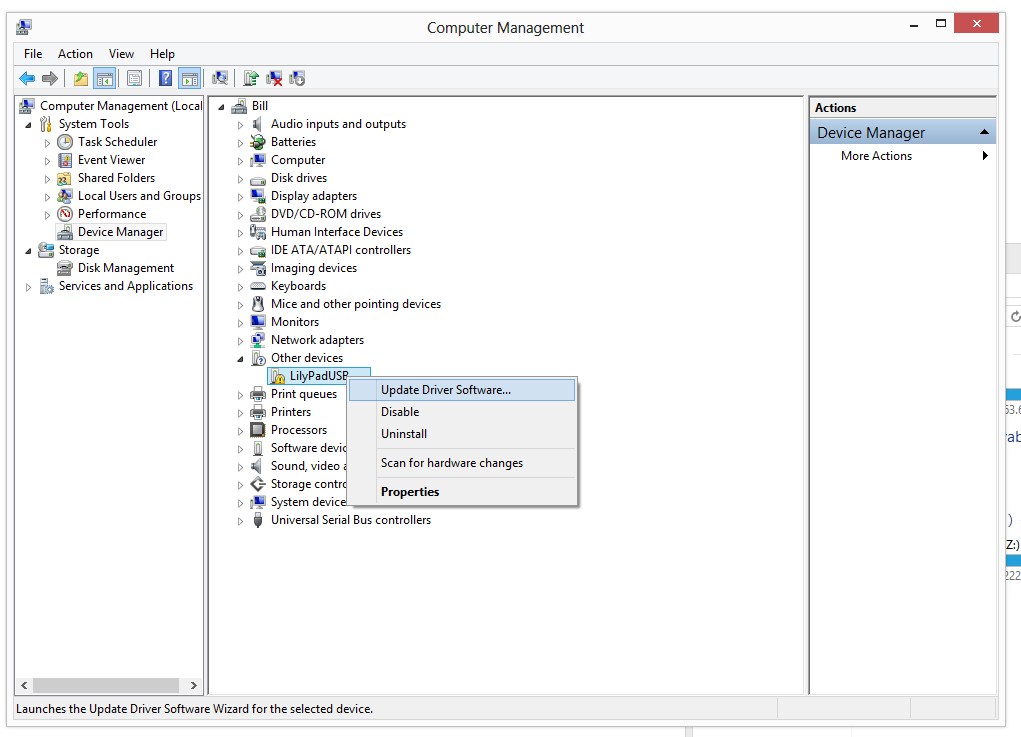
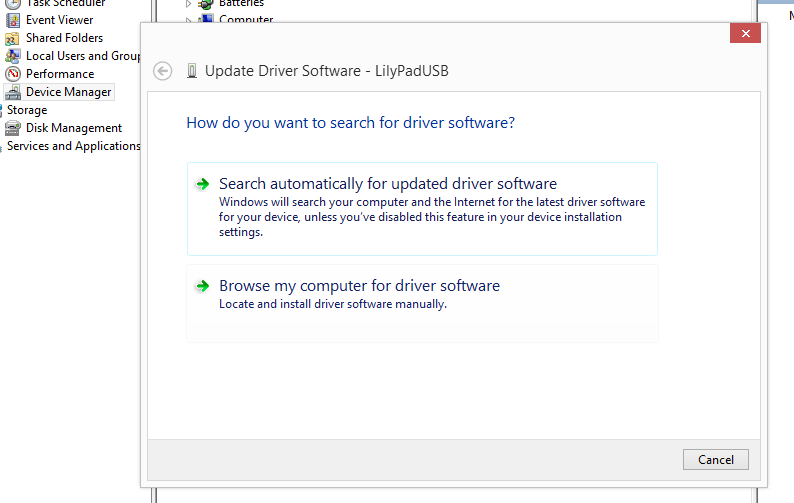
4. Right-Click on LilyPadUSB and then selct Update Driver Software.
5. A window will pop up asking you how you would like to search. Selct Browse my computer for driver software
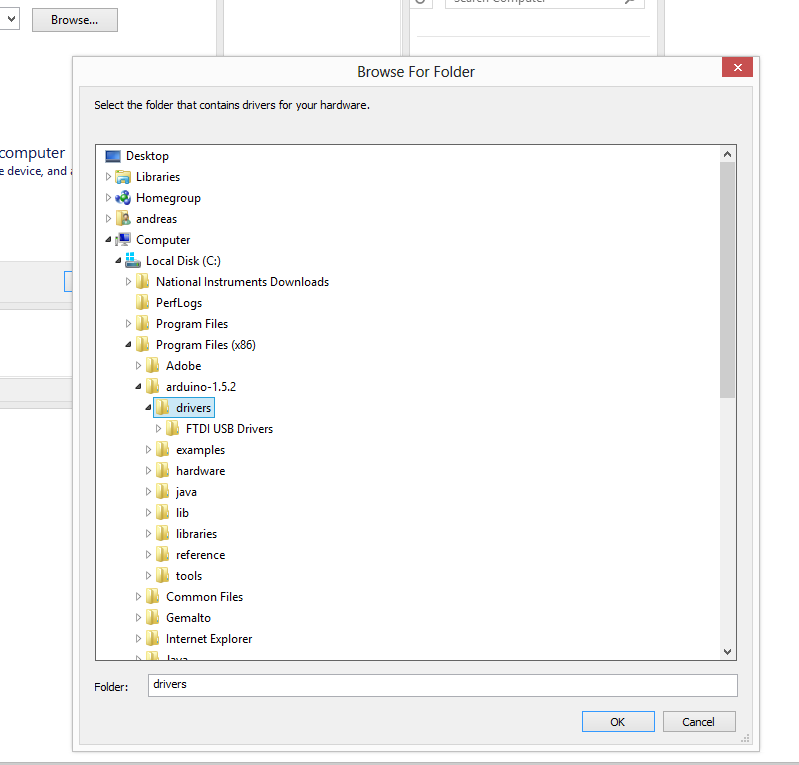
6. A small explorer window will pop up. Navigate to your install folder (Program Files if you followed this guide) and select the drivers folder.
7. Click OK and the drivers will install. You can now follow these instructions to select the correct USB settings and check the communication with your board works correctly.
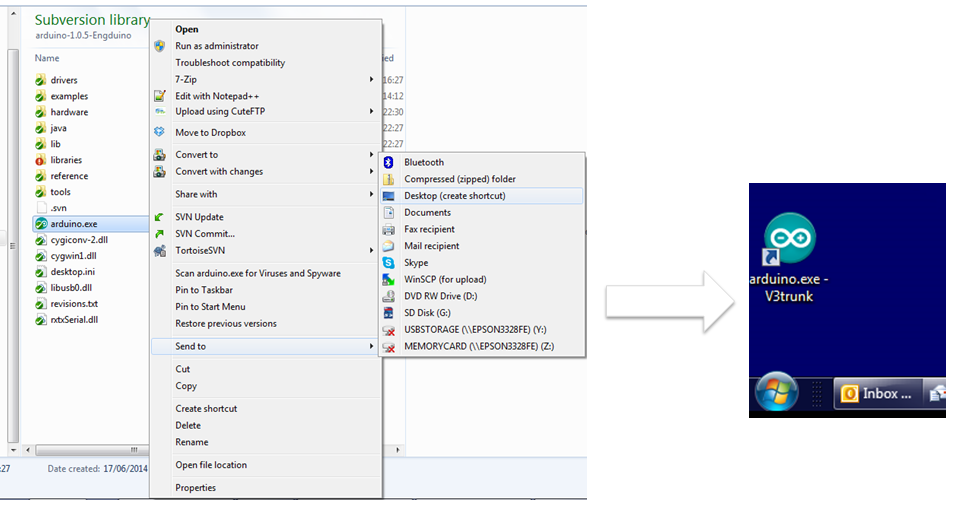
8. Create a shortcut on your desktop by going to Windows Explorer-> your arduino installation folder. Right-click on Arduino.exe, choose send to->desktop (create shortcut).
Windows Installation Video