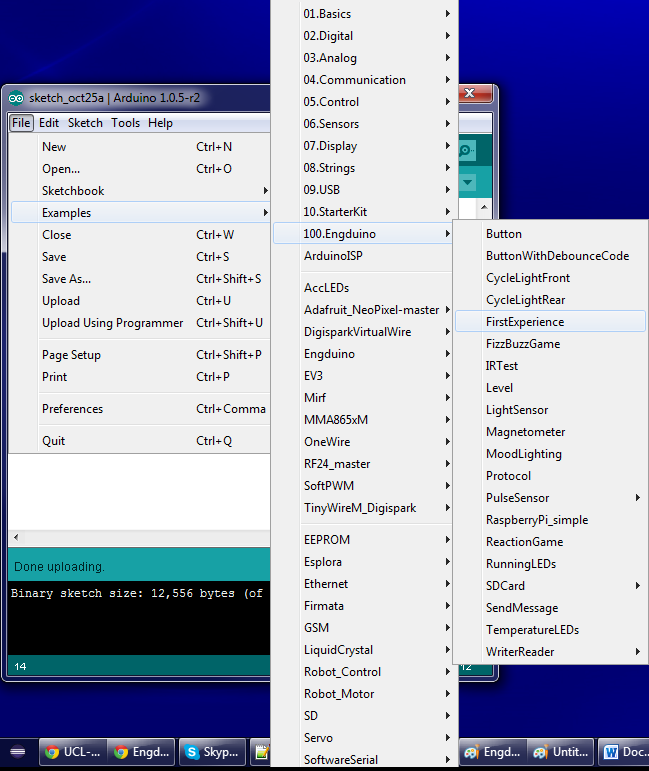
Other Examples in the 100.Engduino Folder
Our Engduino software package comes with a full set of examples for all the components on Engduino to get your started with your own project. Access them via File->Examples->100.Engduino-><particular example>.
Examples explained
 LEDs (light) - CycleLightFront, CycleLightBack, RunningLEDs
The aim of these examples are to show some of the methods of causing the LEDs to turn on and demonstrate how to change the LEDs sequences and patterns. In the RunningLEDs, the first part of the sketch is where red, green and blue LEDs chase anti-clockwise around the Engduino, getting gradually faster until they blur into white. When going sufficiently fast, we display red green and blue on all LEDs, followed by a range of colours.
MoodLighting
The LEDs gradually change colour from one random colour to another, in an amount of time that is random but bounded. This demonstrates a slowly moving change in the rgb value given to the LEDs using an accumulator which ensures that each channel changes at an even rate given a time period in which to change.
The code for this is in the CombinedDemos folder of the examples directory. The demos are also available as stand-alone files.
Button – Button, ButtonWithDebounceCode
Show how to write code with the Engduino button, and how to avoid mistaking the button pressed multiple times if the user holds on to the button.
Accelerometer – Level
Show a red LED on one side if we're low on that side show nothing if we're high, and show green on both sides if it's level(ish). We delay between readings because it's a bit flashy otherwise - too hard to hold steady
Temperature sensor - TemperatureLEDs
In this sketch, the colour of the LEDs changes on a linear scale from blue (cold) to red (hot) via mixtures of the two colours in proportion to the temperature. The temperatures that define blue and red are given in the #defines below. Temperatures outside the range, are capped so those lower than TBLUE are rendered as blue and those higher than TRED are red.
The sketch illustrates the use of both thermistor and LEDs.
Infrared Communication - IRTest, SendMessage
This tests the IR communications. Pressing a button on an Engduino causes a message to be sent. The LEDs flash blue when the message ("Hello World") is sent. An Engduino receiving the message will flash green if it receives the message correctly, and red if not.
Illustrates use of IR, LEDS and the button
Game - FizzBuzzGame
This is a game like fizz-buzz where you have to do mental arithmetic, keeping a running total of the count of LEDs and pushing the button when that count is a multiple of three or five
Game - ReactionGame
This is a game where you must push the button within a short time of seeing a blue LED. If you push the button without a blue LED or if you push too late, you lose and you start again. If you succeed, things get faster.
Data logging - SDCard
This example shows you how to use the micro-SD card holder on Engduino 3 (not available in version 1 and 2) to store your data and read it back.
Serial communication - RaspberryPi_simple
This is a very simple program to demonstrate that it is possible to communicate with the Engduino over the serial connection - both from and to the Engduino. One example use for this is to communicate with a program written in Python on a Raspberry Pi - the bulk of the code can be written on the Pi and the Engduino used for illuminating LEDs or as a sensor input to the Pi.
Extending your hardware - ReaderWriter
For the advance users who would like to connect the Engduino via I2C, this examples show you how to communicate with an external module.
 |  |