Windows OS Installation Guide
Getting Prepared
1. Get your Engduino board & USB extension cable (optional - if your USB port is not easy to reach, you can use an extension cable or a USB hub) ready.
2. Download Engduino software (Arduino software with Engduino extension) from here
3. Follow the instruction of the installation package
- If you need more instructions, follow Engduino Installer Step-by Step Guide
- Or jump to Testing the Engduino and Uploading your FirstExperience Code
Engduino Installer Step-by-Step Guide
1. To start the installation, double-click Arduino-1.6.0-EngduinoV310.exe you have just downloaded.
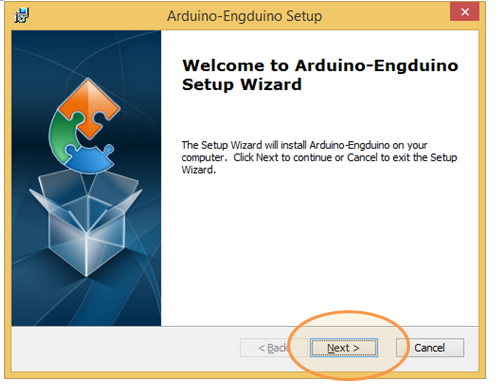
2. The Engduino installation software will start. Click “Next>”
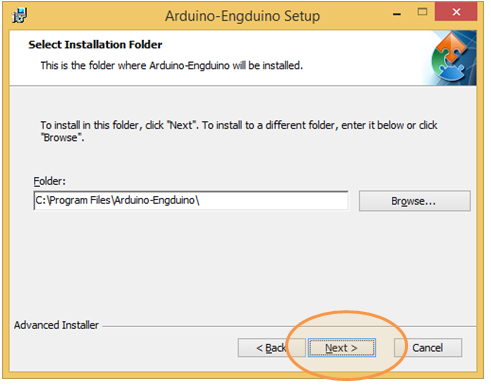
3. You can leave the default installation settings, click next>
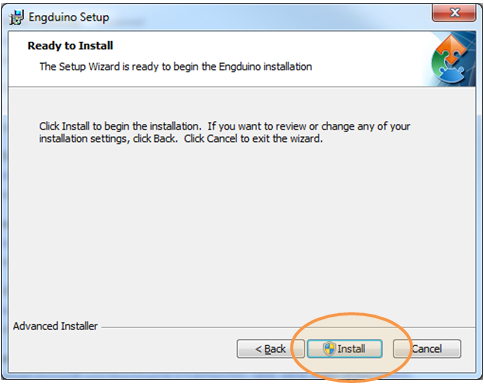
4. Install the software
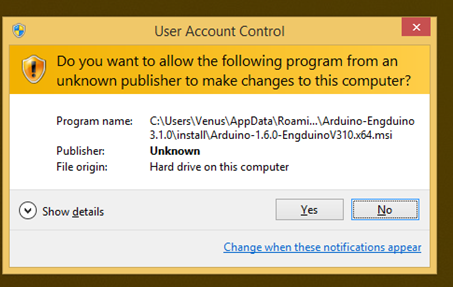
5. Click yes to when prompt for security.
6. Wait until installation finishes

7. Install driver for Engduino (Arduino Lilypad USB)

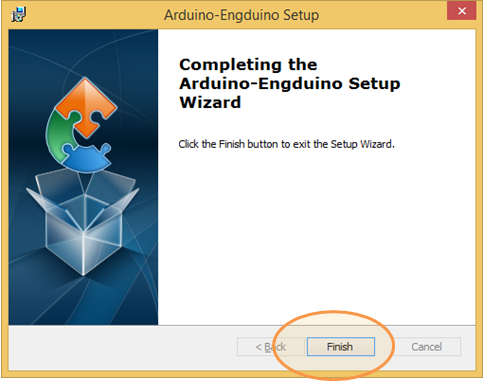
8. Complete the installation

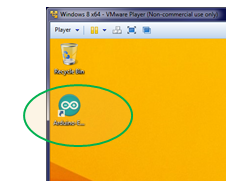
8. The “Arduino” software shortcut located on the desktop
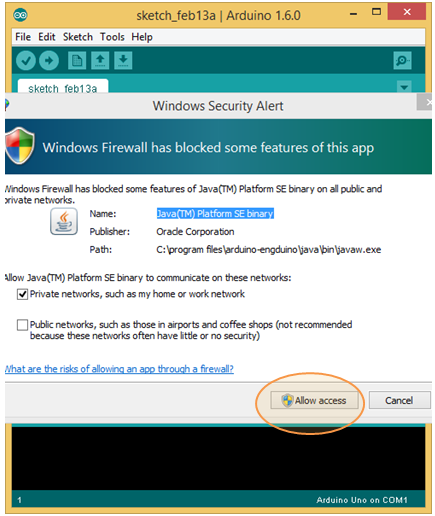
9. Open the Arduino software the first time you may get this security warning. Choose "Allow access".
Testing the Engduino and Uploading Your First Experience Code
1. Find the switch at the bottom of the Engduino and switch it on. Plug it into a USB port.
2. Open the Arduino software you have just downloaded
3. Prepare and configure the Arduino for Engduino
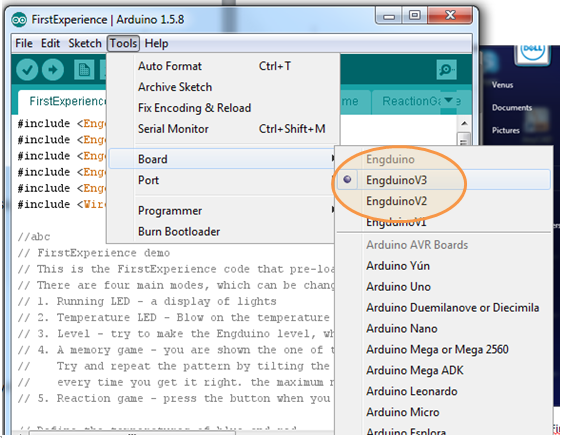
- Choose the Engduino board by going to Tools=>Board=>EngduinoV3
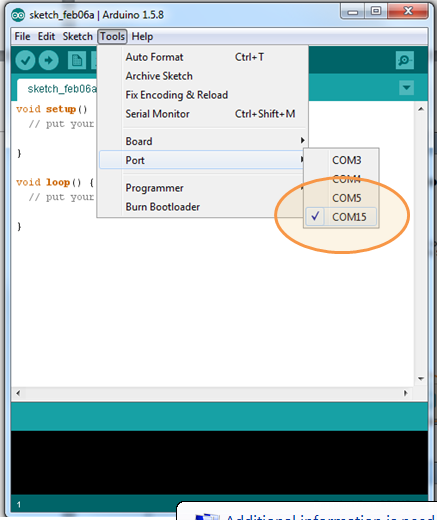
- Choose the communication port (the USB port that your computer “talks” to Engduino)
- On my computer, it is “COM15” on my computer (unfortunately this is different for every computer). If you are not sure which one is used on your computer, you can unplug the Engduino, check the list of “COM ports”, and plug it in again (turned on) to see which one is the additional one.
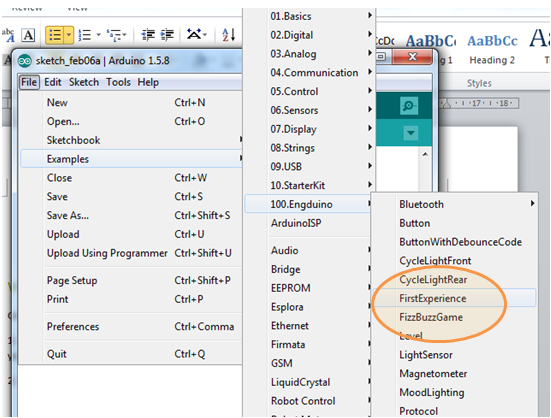
4. Go to File=>Examples=>100.Engduino=>FirstExperience
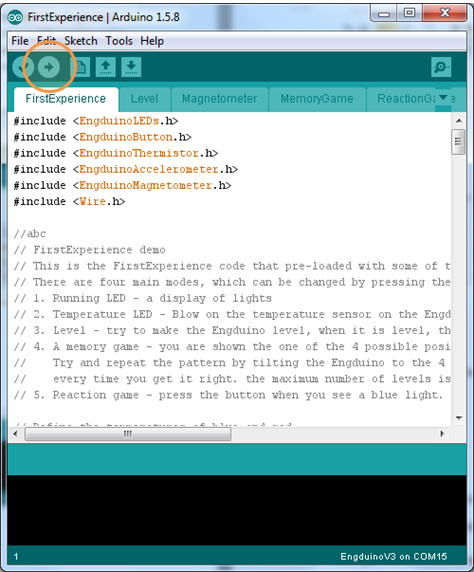
5. Locate the “arrow” button, which will transfer the code from your computer to the “brain” on the Engduino
Common Error Messages and FAQs
Some of the error messages could sound very scary, but it could be due to very simple reasons and can be solved very easily.
1. Error Compiling: Missing Engduino Libraries
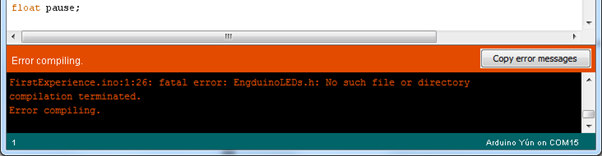
Symptom: You see similar messages as above telling you that you are missing certain Engduino libraries. Depending on the Sketch you are trying to compile, the libraries may be different from shown.
Solution: Make sure that you have selected the right Engduino board from the drop down menu Tools=>Board=>EngduinoVx
Diagnosis: You are working on physical computing with the Engduino. The codes that you wrote on the Arduino software are translated to binary codes uploaded to the device to control the individual components. This is really specific to each device; the Arduino software needs to know which device you want to use in order to translate it correctly! A bit like if you want Google Translate to translate some internet articles for you. It would be completely useful if Google translate it to Japanese for you! (Well, not unless if you know Japanese of course.)
2. Error: Couldn’t find a board on the selected port.
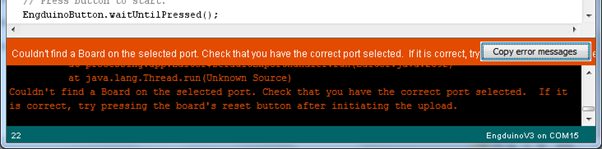
Solution
- Make sure the Engduino is switched ON before you plug it in the USB port
- Make sure the correct COM port is selected. (How can you tell?)
- Unplug the Engduino and plug it in again
- Try another USB port
- Some computers/laptops are more trouble than the others. If you have tried solution 1-4 and it still doesn’t work, contact us with your problem.
Diagnosis: The “COMx port” is the channel your computer uses to download binary code to the Engduino. It is also used to “talks” to your Engduino, when it wants to read out and write some messages to the device. (e.g. when you use Serial.println).
This could be caused by different reasons when the COM port was not found. Try out the solutions above to make sure the communication channel is correct. You can’t talk to your friend Jack, if you call Ben by mistake; neither can you speak to Jack if he switches his mobile phone off!
3.FAQ: How can you know which COM port (COMx) is being used by the Engduino?
The lazy way: Unplug the Engduino, look at the list of COM ports under menu Tools=>Port. Plug it in again and find the extra one in the list.
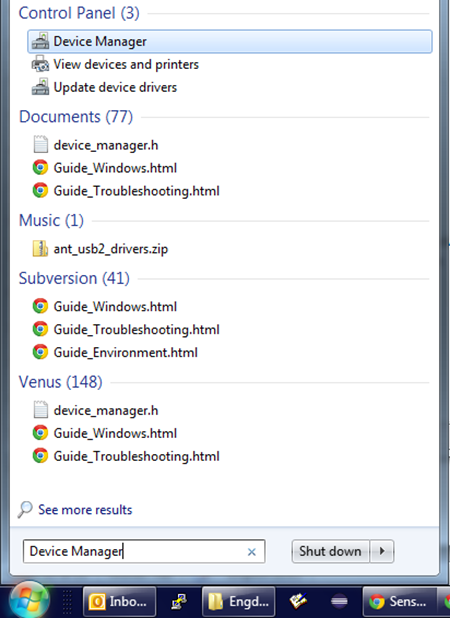
The proper way: At the Start=>Search menu, type “Device Manager”. You will see all the hardware your computer has. Under Ports (COMS&LPT), find “Arduino Lilypad USB” and note down the COM port number next to it.
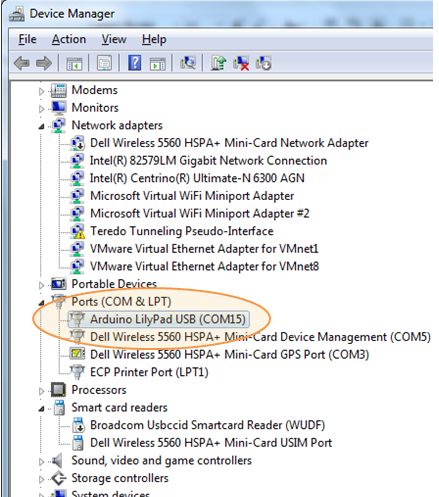
4. Why is an Engduino listed as “Arduino Lilypad USB”?
Part of the hardware design of the Engduino is the same as “Arduino Lilypad USB” that allow us to use the same driver for the computer to speak to Engduino. This is our workaround at the moment to solve the problem that we don’t have enough time and “hands” to do the technical development and support!
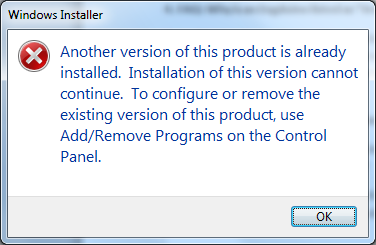
5. “Another version of this product is installed”… What should I do?
You need to uninstall previously installed Engduino software. Navigate to Control panel=>Uninstall or change a program.
6. Other Security warning Windows
As the Internet, computers and digital device become more and more accessible, so do malware (malicious software), virus, and other software that can harm your device and breach your privacy. It is no wonder that both Windows and Apple has put in additional measures to ensure security and privacy are in place. Hence, it takes a few more click to go through the installation of Arduino-Engduino in our process, and you may encounter a few security warnings.
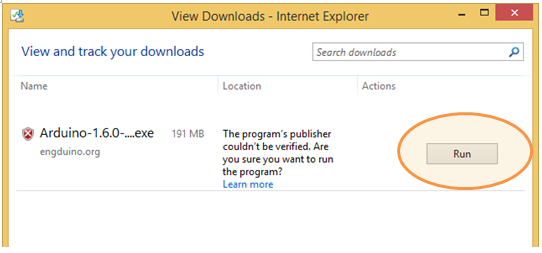
Downloaded software
Click "Run" to proceed
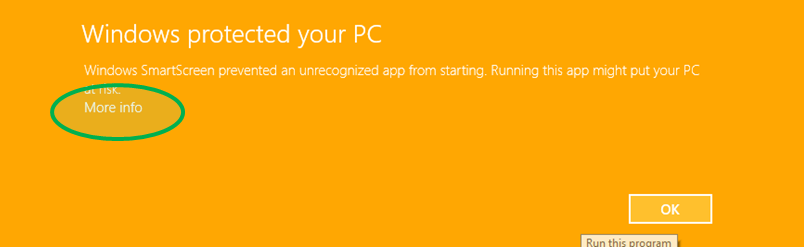
Windows Smartscreen
You may encounter Windows Smartscreen preventing the installing the Arduino-Engduino software. You need to click on “More info”; then there the option “Run anyway” will appear to allow the installation.