LED matrix project
These 8x8 LED matrixes are seriously cute and full of potential. There are a variety of colours (red, blue, green, orange... My favouite is the blue) and sizes to choose from, and you can make them into so many different fun things!
Let's watch a video of what it can do.
This project is really simple and it looks harder than it is (good for showing off). It will take you 30 mins to 1 hour to make it works the first time, when you have all the bits ready.
 List of material
1. Adafruit mini white 8x8 LED matrix (or other colours and sizes).
http://www.adafruit.com/products/1080
You can choose different colours and sizes of matrix - Adafruit is an US-based company, but there may be UK based or European companies selling them. Just search for Adafruit LED matrix, and watch out that it does have I2C backing (This does all the hard work communicating with Engduino).
2. Connection from Engduino
You only need 4 wires to connect the LED Matrix to Engduino. In our example, we connect the Engduino via a breadboard, like this one.
You will then need 4 male to male connector, like this one.
www.amazon.co.uk/Accmart-Flexible-Breadboard-Adapter-Colorful/dp/B00MQEKXNM/ref=sr_1_1
If you would like to connect it directly to the Engduino, you just need 4 female to male connector, like this one:-
www.amazon.co.uk/Male-Connector-Jumper-Cable-Breadboard/dp/B00H56HWH6/ref=sr_1_2
Does it surprise you that you can get these bits on Amazon, or eBay, or Maplin. Anywhere that's good for you!
3. Of course you would need your Engduino 3!
Procedure
Prepare your Adafruit LED Matrix
You do need to do a little soldering to make up the board. It should only take you 5 mins when the soldering iron is hot and ready! The instruction to do that is here:-
https://learn.adafruit.com/adafruit-led-backpack/
https://learn.adafruit.com/adafruit-led-backpack/1-2-8x8-matrix
https://learn.adafruit.com/downloads/pdf/adafruit-led-backpack.pdf
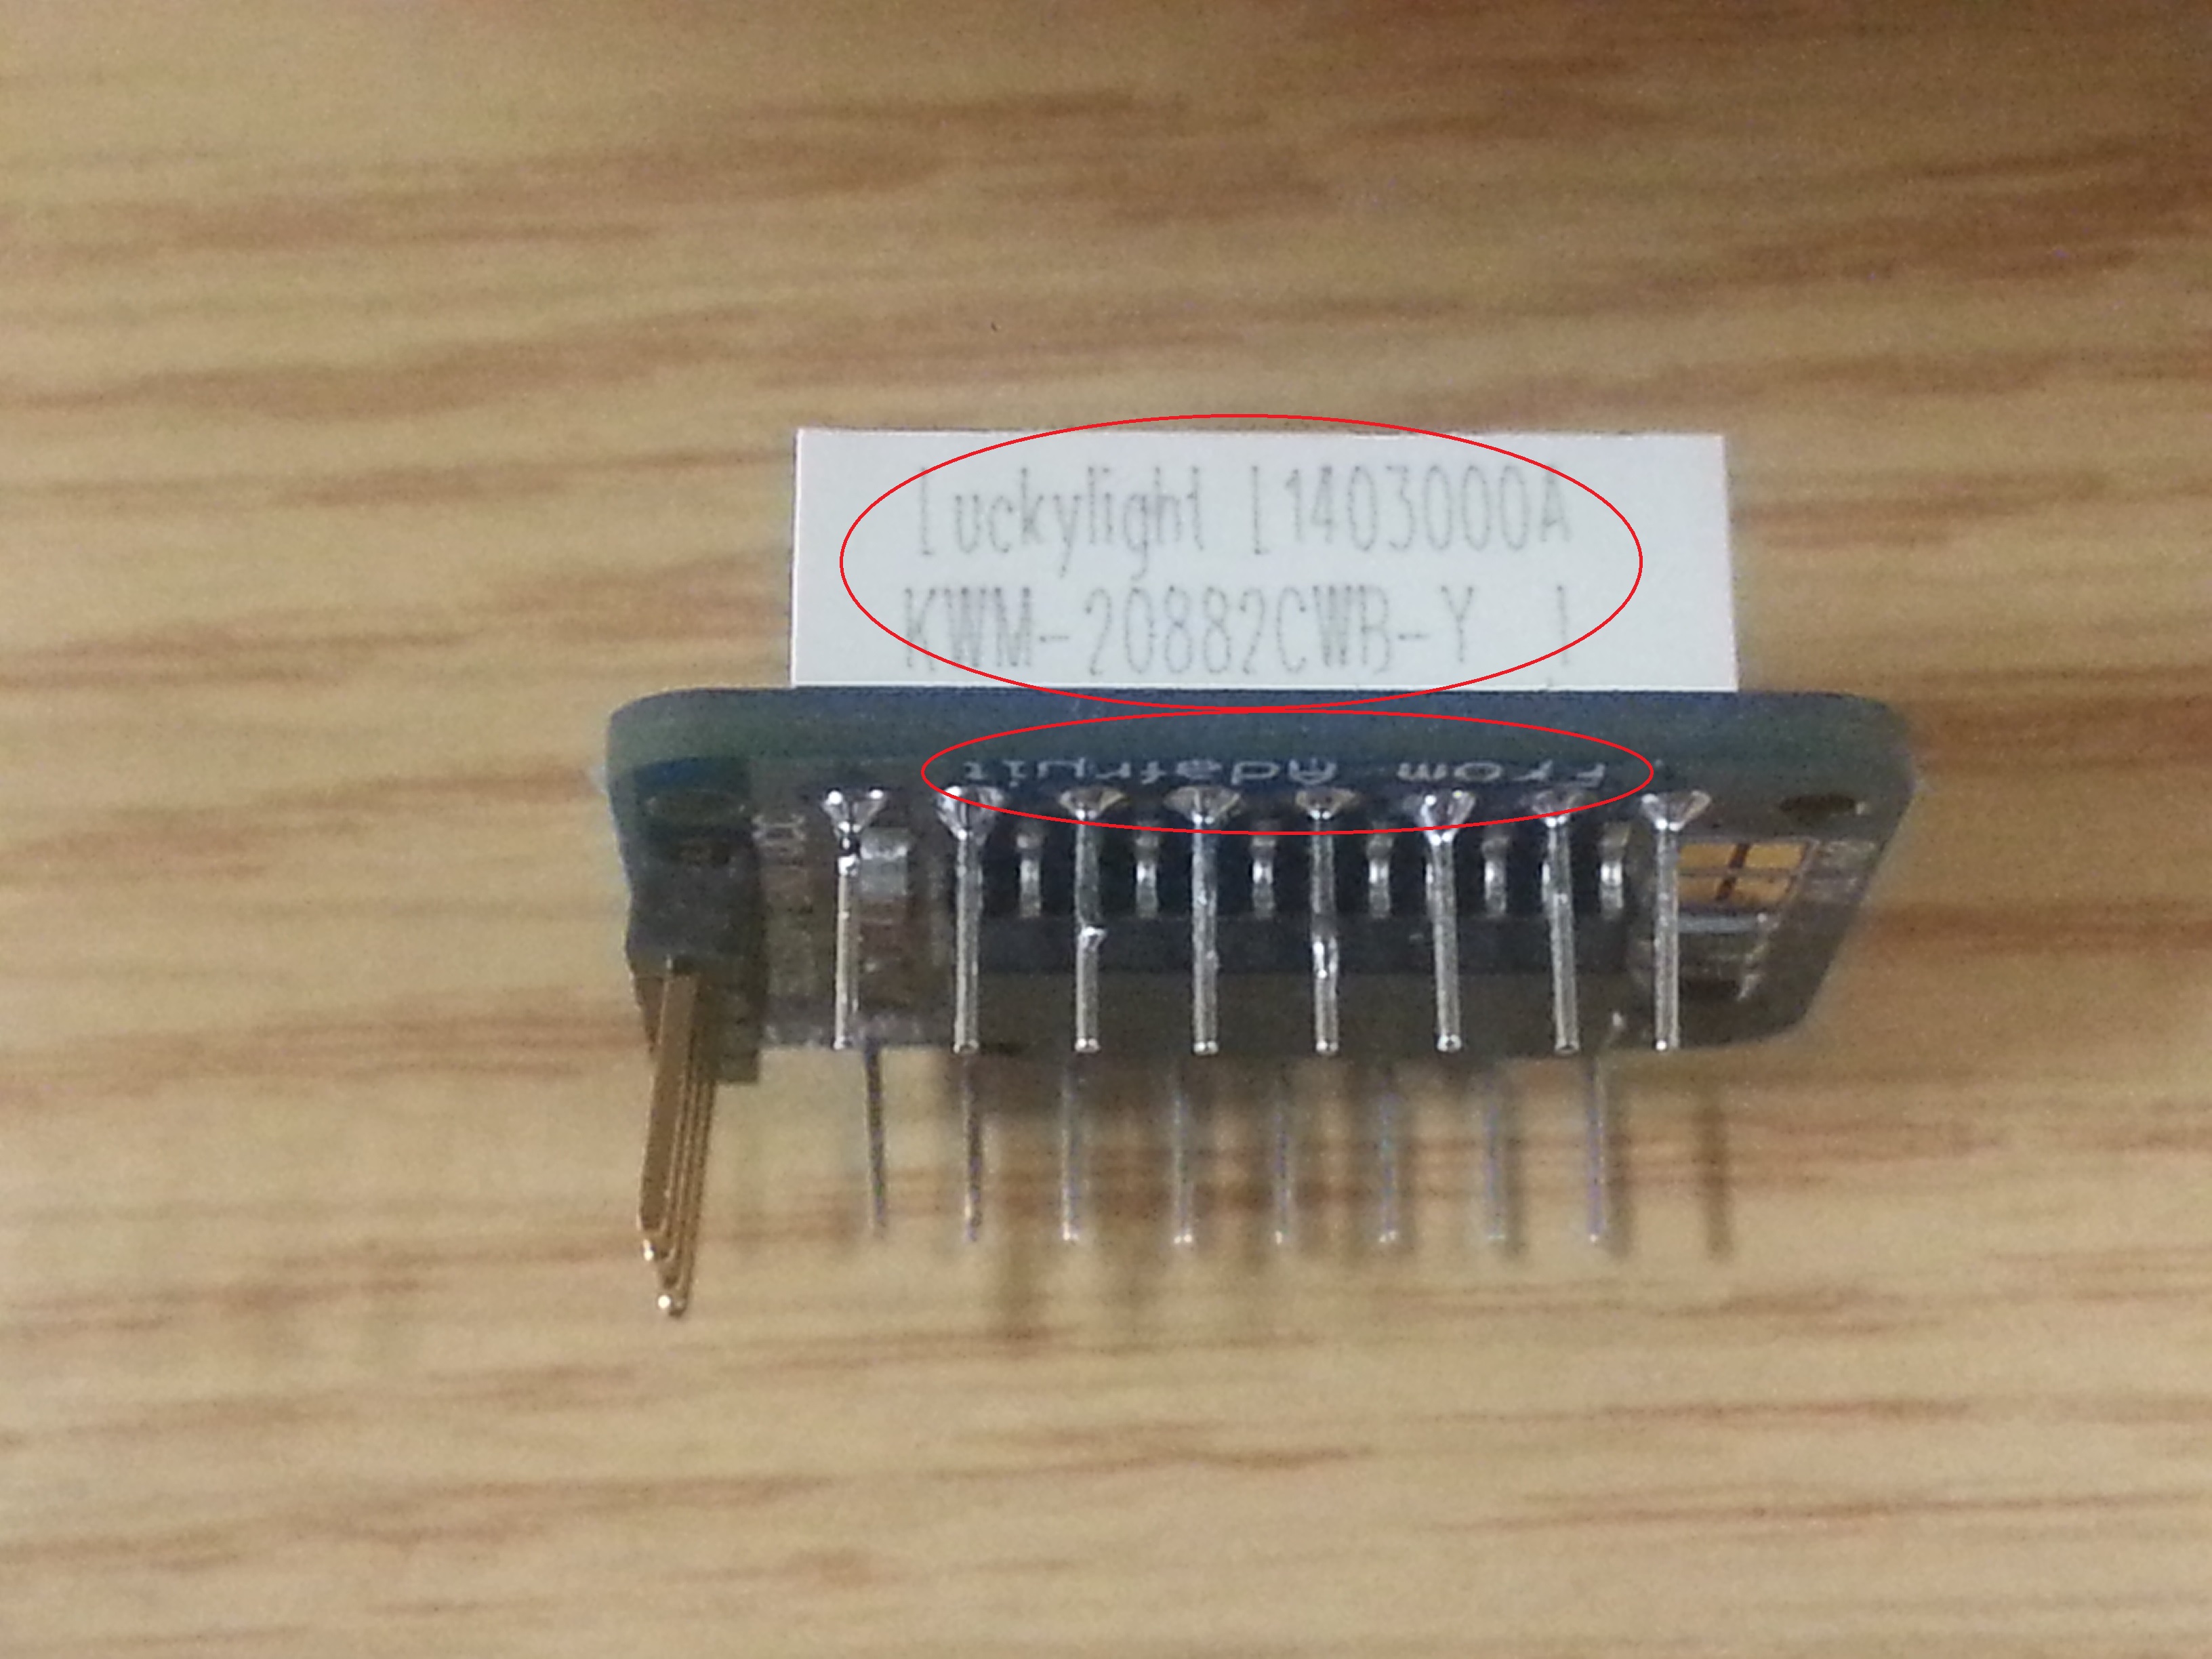
!!!Triple check that the text on the LED matrix is on the same side as the "From Adafruit" text!!!
Preparing your Arduino-Engduino programming Environment
To make the LED matrix hardware works with Engduino, you need the Drivers for the LED Matrix
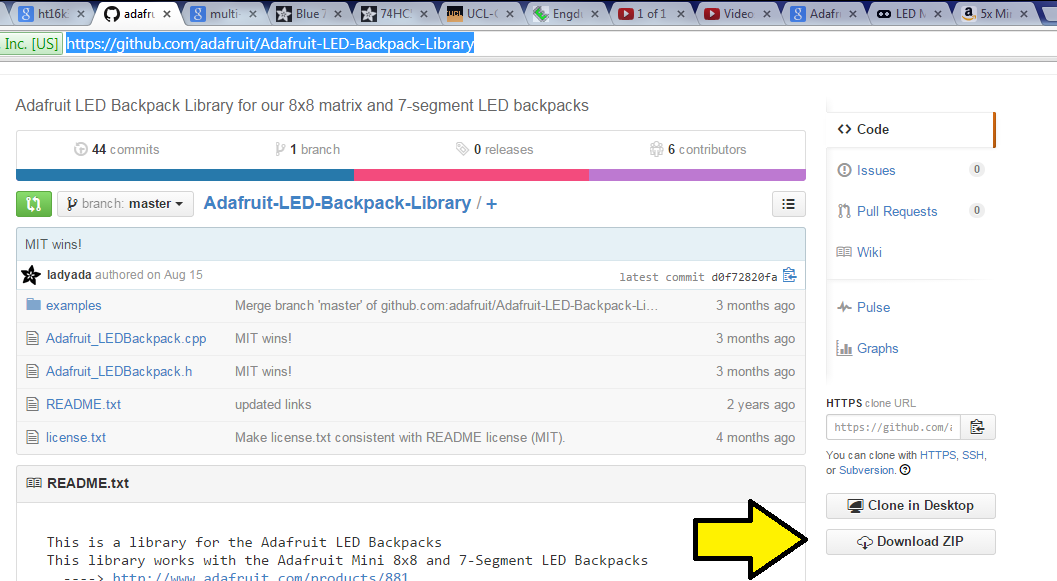
1. You need to download the following 2 libraries - zip files
- https://github.com/adafruit/Adafruit-LED-Backpack-Library
- https://github.com/adafruit/Adafruit-GFX-Library
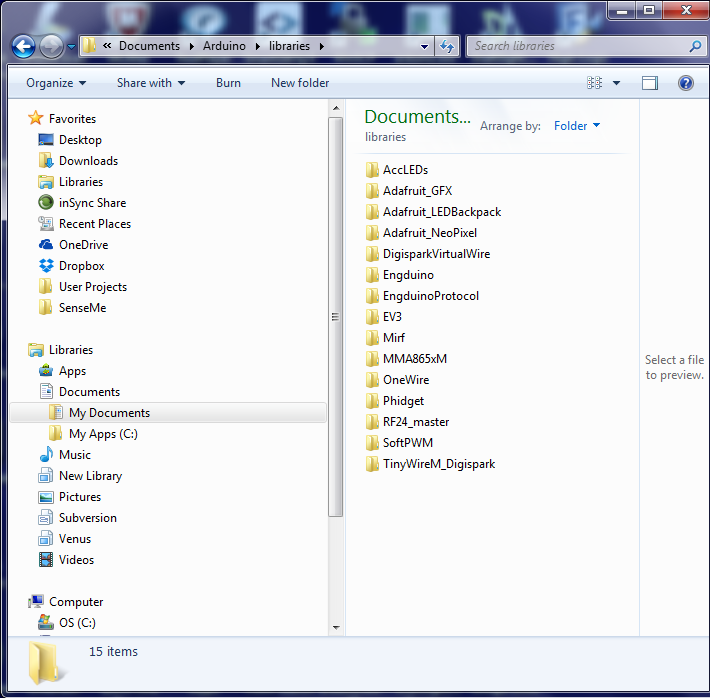
Unzip them in your Document/Arduino/Library folder (for windows users. For MAC and Linux users, you need to find out where your Arduino personal codes are). These is where I put all my external Arduino libraries.
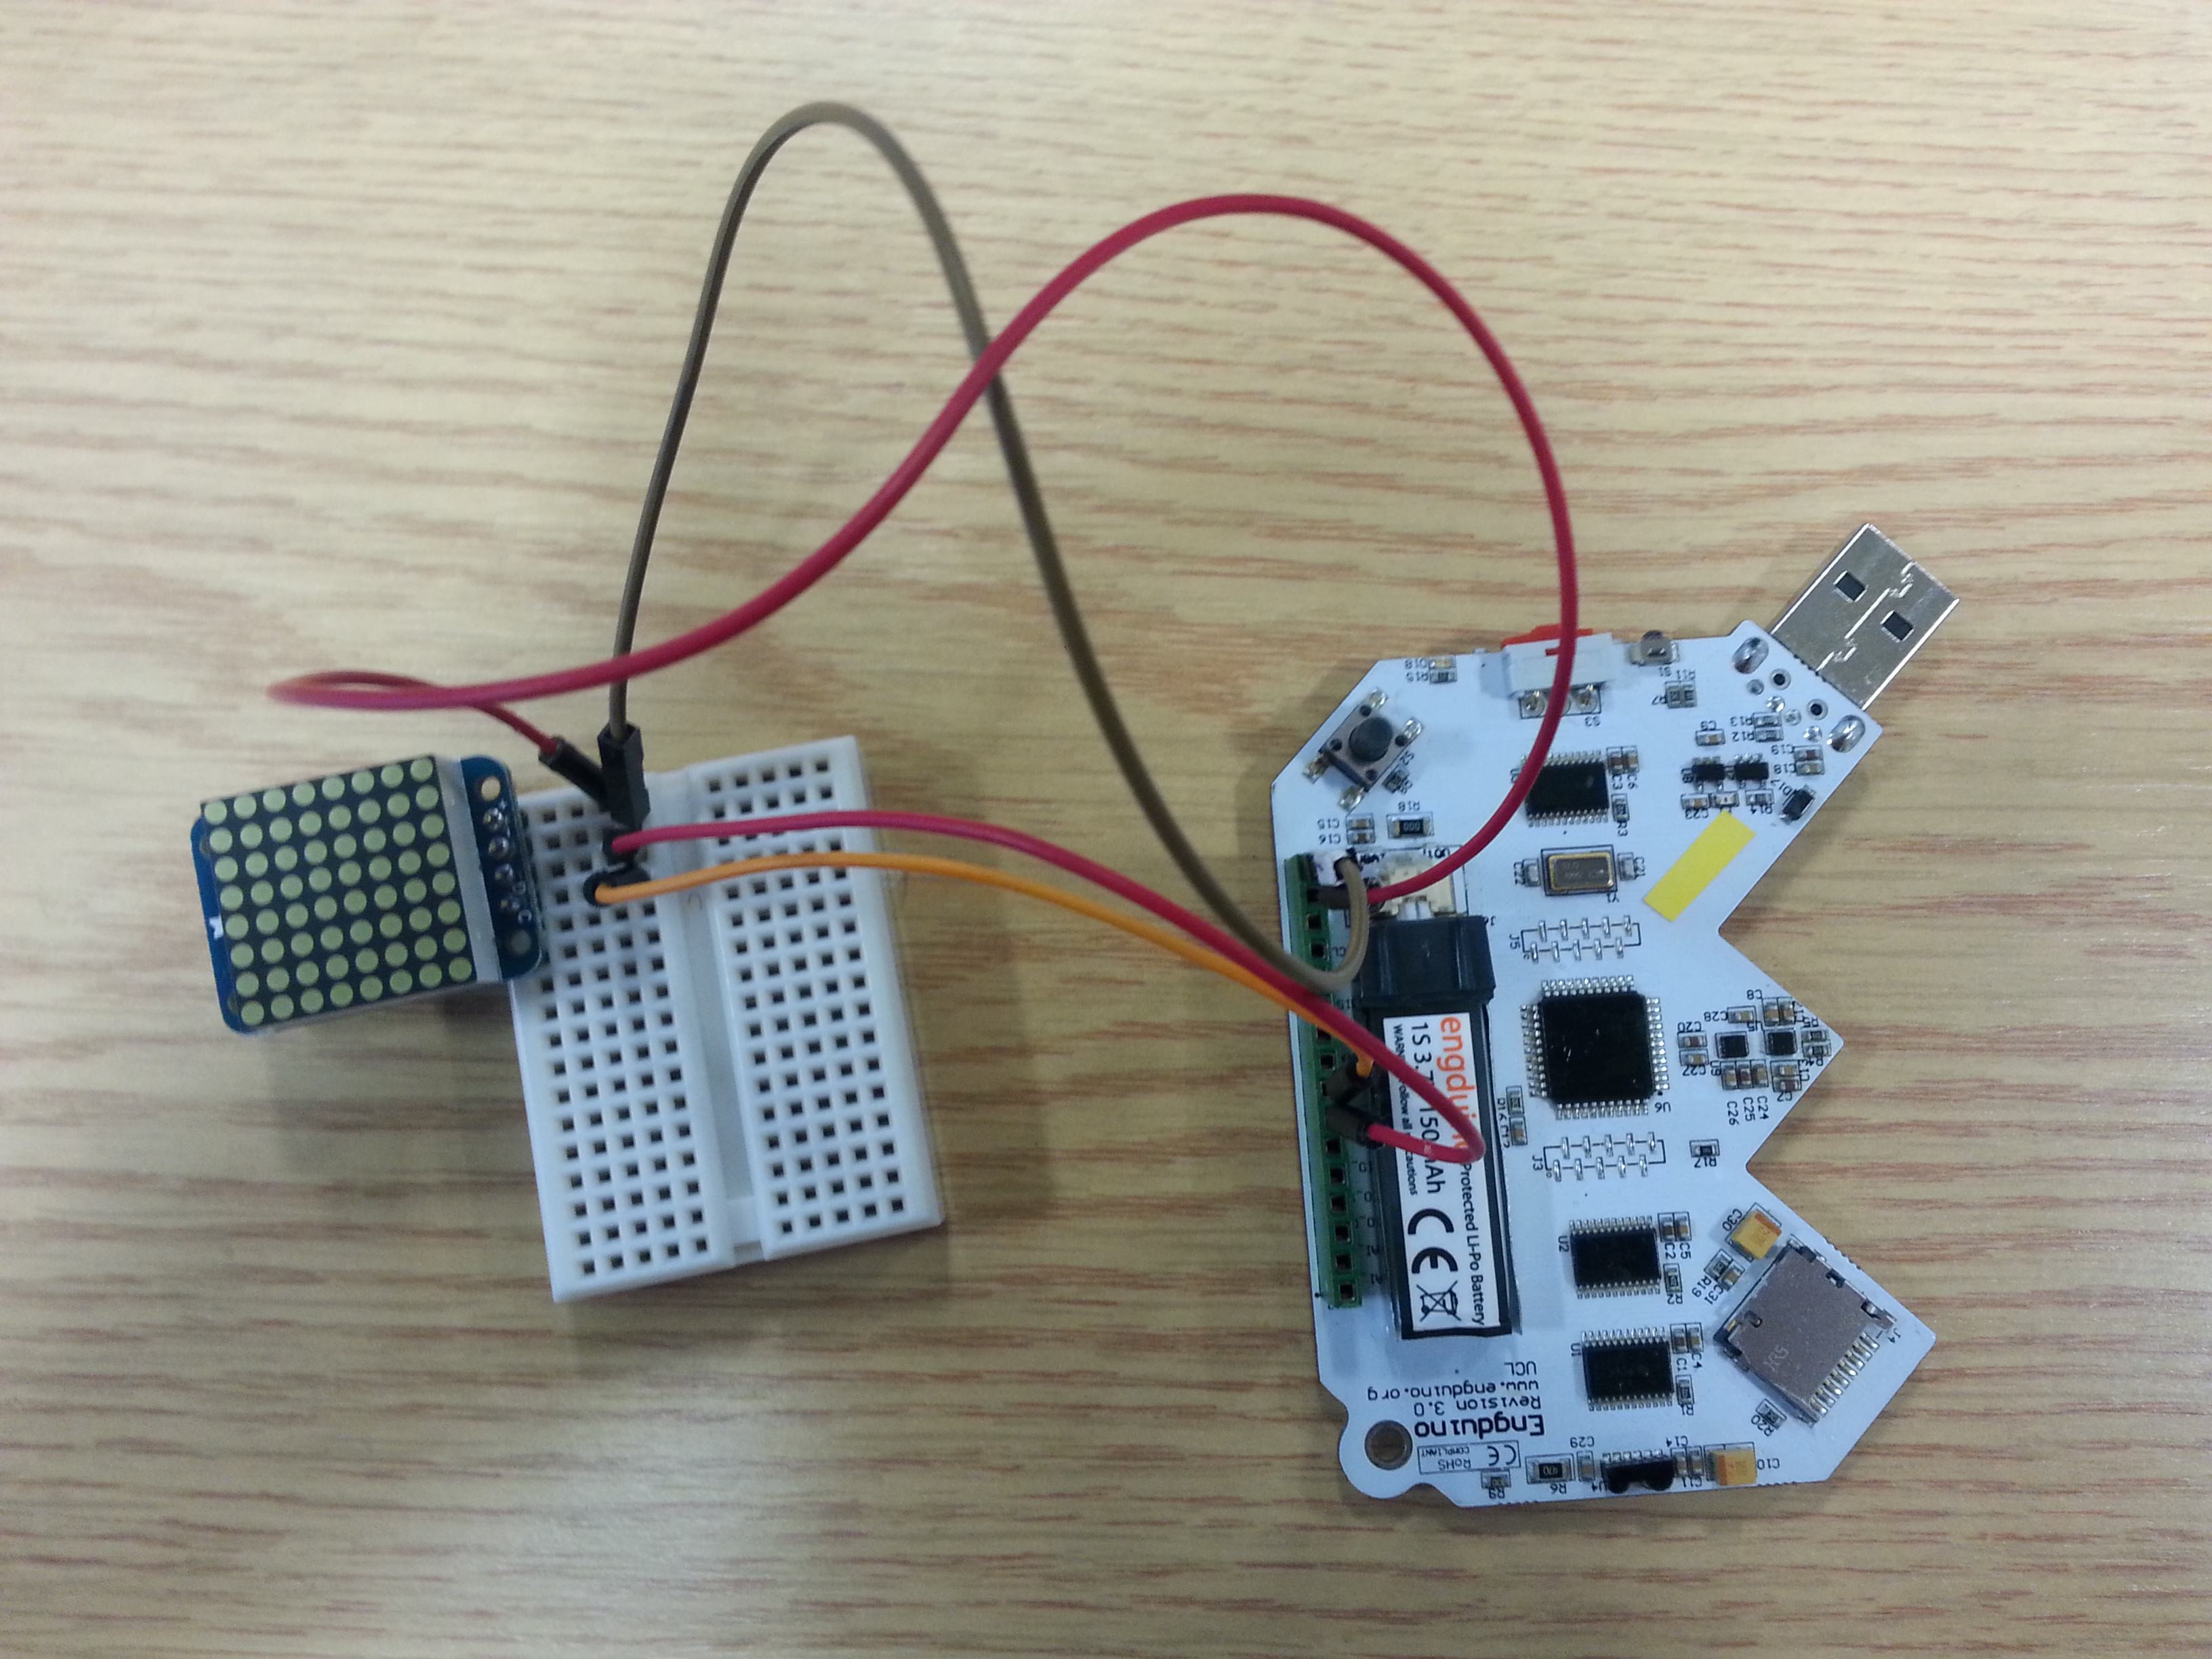
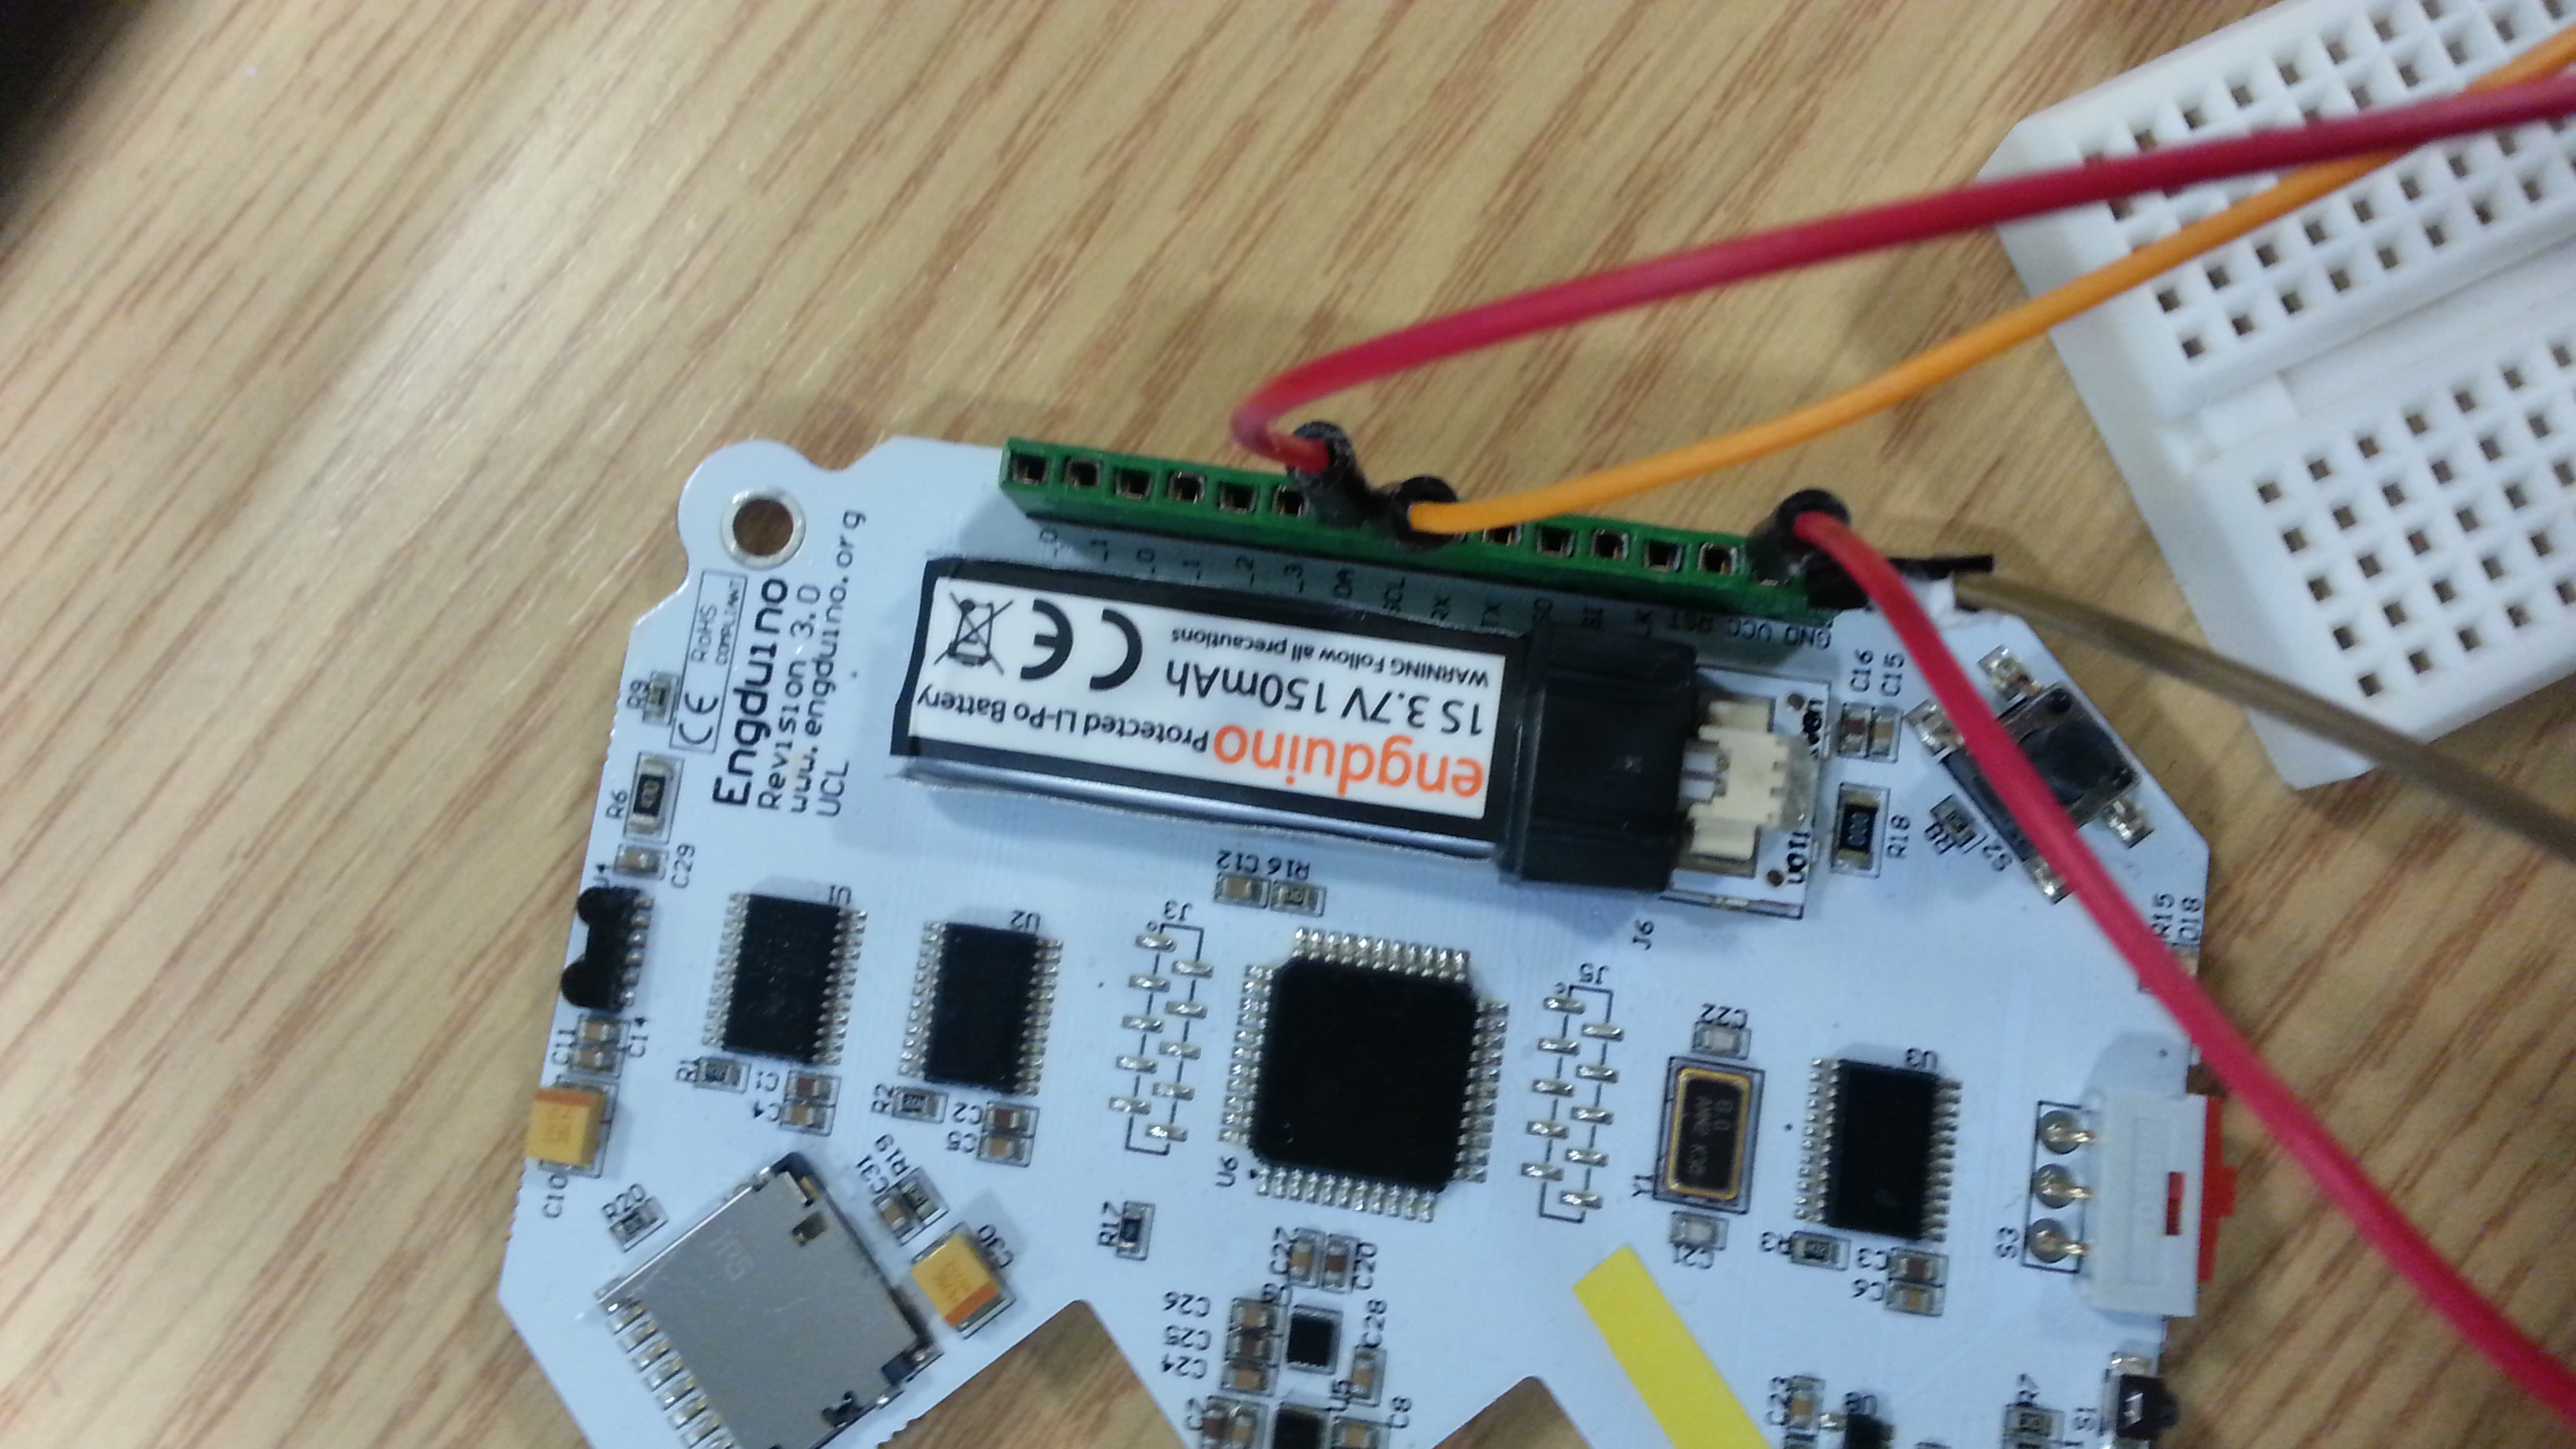
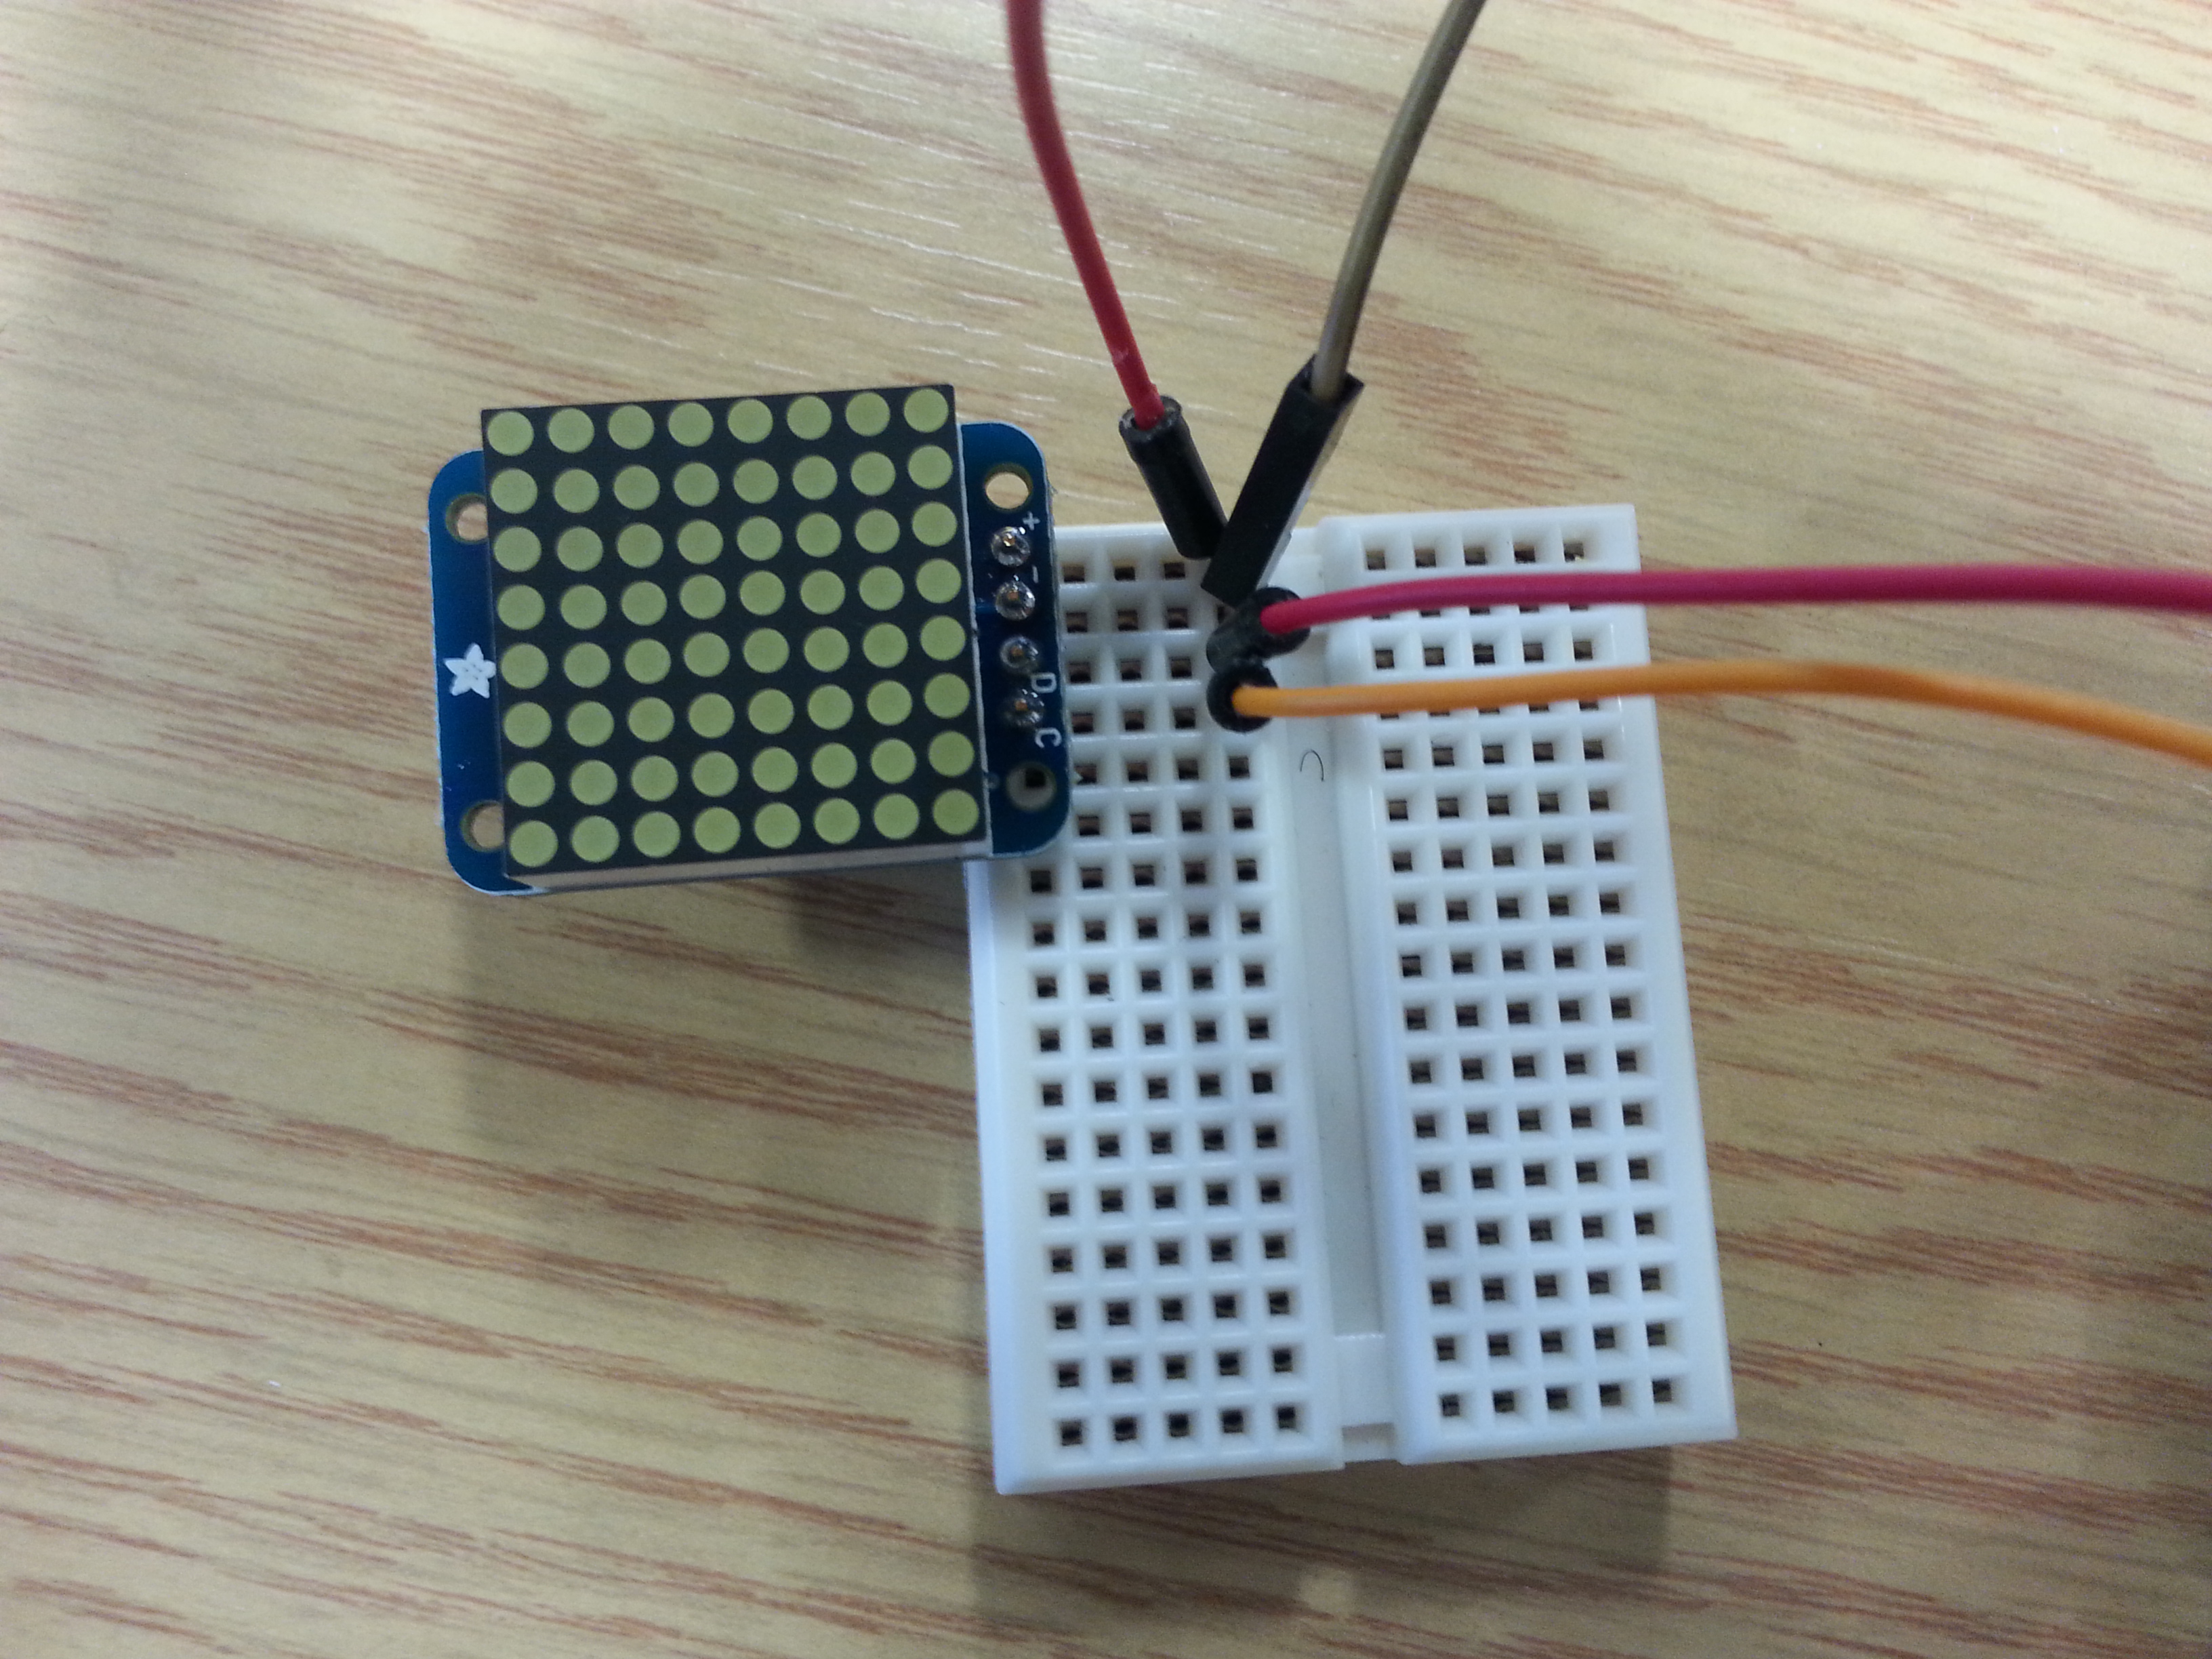
Connect the Engduino and LED matrix
You can now connect the two hardware together:-
| Engduino | LED Matrix |
|---|---|
| Vcc | + (positive) |
| GND | - (negative) |
| SCL | C |
| SDA | D |
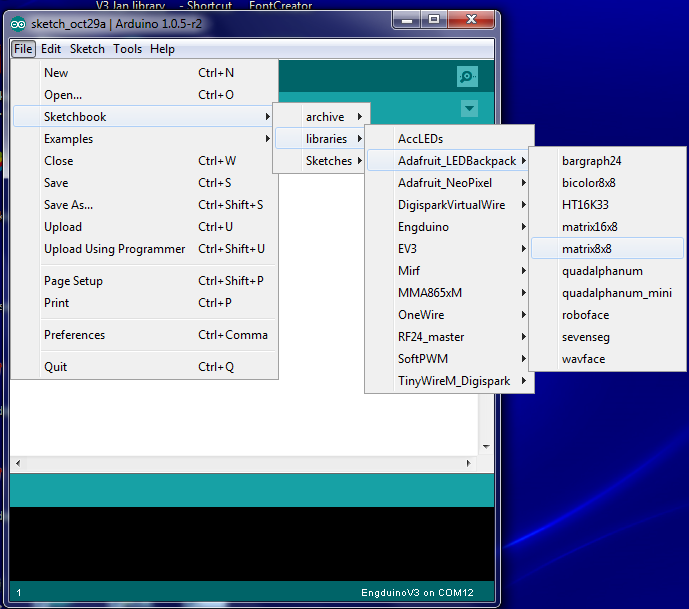
After this, you should see all the build-in examples in your Arduino-Engduino application.
If you have put the two libraries in your personal Arduino folder (as opposed to the system Arduino folder), you should find the examples here in File->Sketchbook->libraries->Arduino_LEDBackpack:
Let's upload matrix8x8 example using the normal "Verify", "Upload" procedure to upload Engduino sketch. This is the example in the video above. It is really easy to change too!
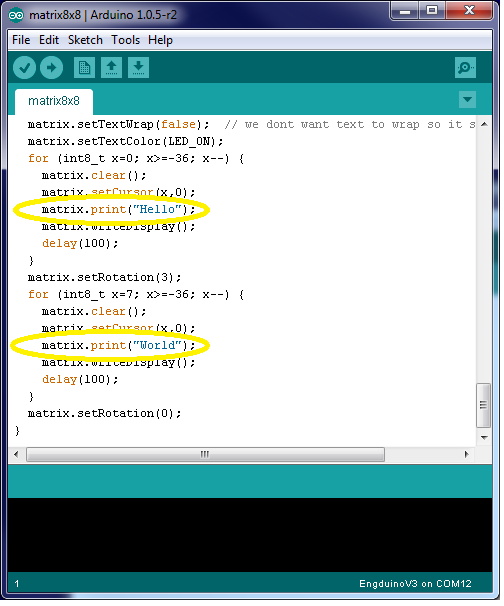
Find the lines
matrix.print("Hello");
matrix.print("World");
And change them to your own messages.
You can design your own patterns in Excel and create to bitmap by making the cells in Excel square looking and colour in the cells that you want the light to be on. Or you can download this tools to transfer images to bitmap
github.com/ehubin/Adafruit-GFX-Library/tree/master/Img2Code
With a little imagination, sticking, gluing and coding, you can make you own pendant, hang it on school bags, make a light attached to your bike helmet. The possibilities are in your hands!