In order to learn more about the Engduino, and see a step-by-step tutorial on setting up hardware, please watch this video.
Main features:
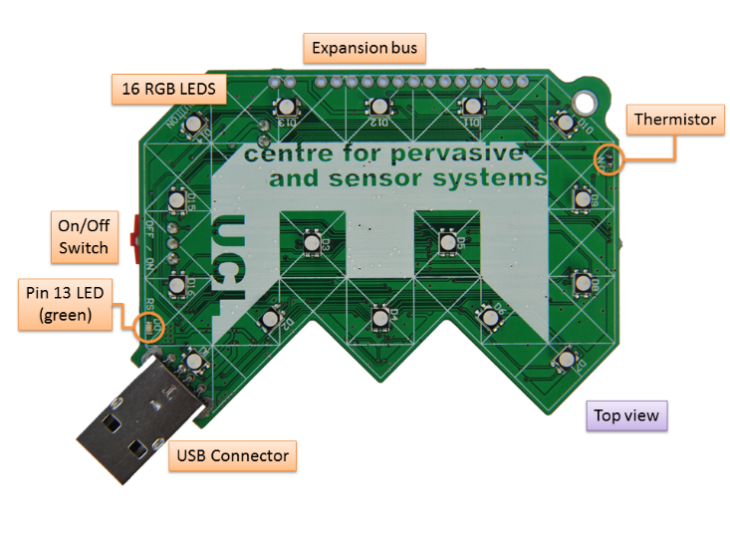
- 16 bright RGB LED lights
- Sensors
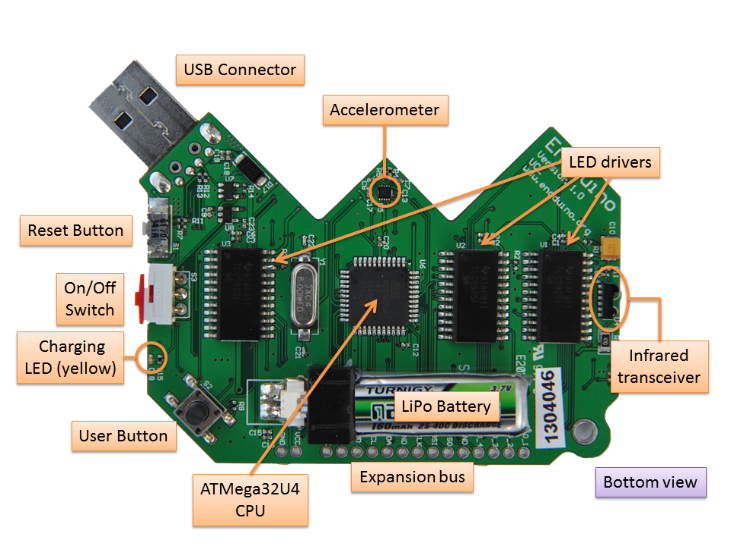
- An accelerometer
- A temperature sensor
- Light sensor (v2 and v3 only)
- Magnetometer (v2 and v3 only)
- An infrared transceiver
- A rechargeable battery
- Micro-SD card reader (v3 only)
- USB programming and communication interface
At heart, the Engduino is a simple, inexpensive computer, designed primarily for teaching programming in a way that is interesting. Like other Arduinos, it can’t be programmed in Python – the Arduinos have a special language that is more like C++.
More about the Engudino
It has a battery – which means you can use it wherever you want, not just when it’s connected to a mains lead or another computer. It has 16 multicolour LEDs that can be lit with red, green, and blue, and any mixture of these. For example, one might mix these primary colours to get the secondary colours.
There is a button – which can be used for whatever you would like – to make a choice between different options, to play a game. It’s up to you and your program.
The Engduino can measure acceleration using a device called an accelerometer.
How to connect
Like Arduinos, the Engduino can communicate with a computer over the USB – so you see what it is doing and you can communicate with it from, say, a Python or Java program simply by reading from and writing to the serial port. This means you can write your own GUI, allowing, say, the LEDs to be set, or the temperature to be displayed – and you can run this program on a PC, a Raspberry Pi or whatever you please.
Step 1 - Download the Arduino Environment from this link. When the download finishes, unzip the downloaded file and open it.
Step 2 – Connect the board to your PC
Step 3 – Install the drivers
- Plug in your board and wait for Windows to begin it’s driver installation process
- After a few moments, the process will fail, despite its best efforts.
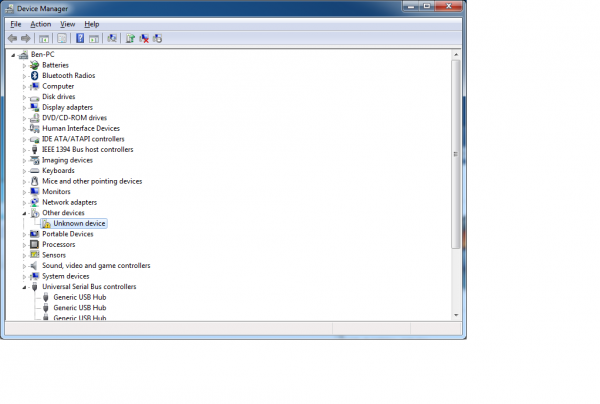
- Open the Device Manager.
- Look under ‘Other Devices’ for ‘Unknown Device’.
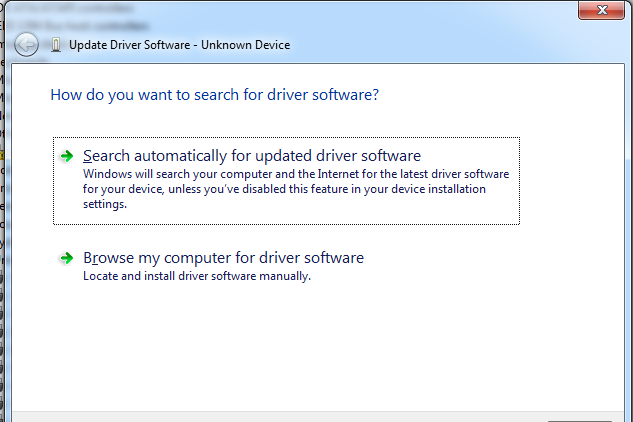
- Right click on the “Unknown Device” port and choose the “Update Driver Software” option.
- Next, choose the “Browse my computer for Driver software” option.
- Finally, navigate to and select the driver file located in the “Drivers” folder of the Arduino Software download.
- Windows will finish up the driver installation from there.
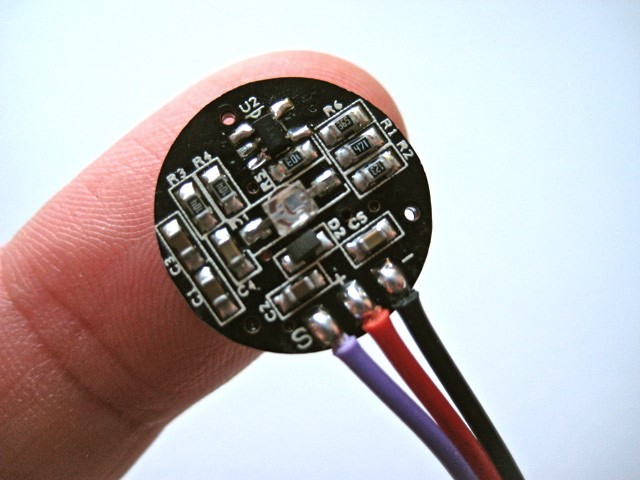
Additional Sensors - The Pulse Sensor
You can interface the Engduino to other sensors. For example, we have interfaced ours to a pulse sensor so the LEDs flash along with your heartbeat.
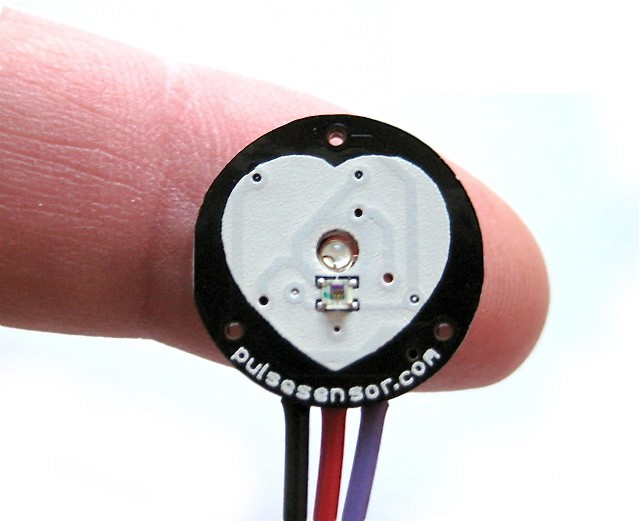
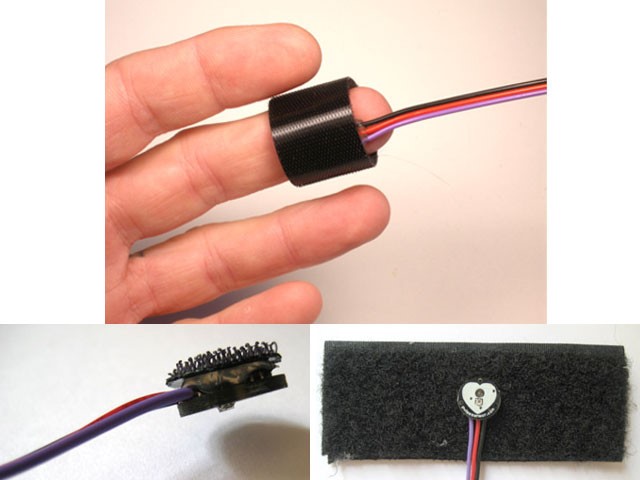
The pulse rate monitor will be connected to the breakout board on the Engduino. The wires need to be connected as shown below:
| Pulse Sensor | Engduino Pin Label |
|---|---|
| Black wire (Ground) | GND |
| Red wire (Power) | VCC |
| Purple wire (Data) | A_IO_1 |
Congratulations! You have completed the first part of the project – Setting the hardware up.